800v
Well-Known Member
- Joined
- Jul 26, 2022
- Threads
- 5
- Messages
- 172
- Reaction score
- 216
- Location
- WA
- Vehicles
- 2020 Taycan Turbo S (Carrara white metallic)
- Thread starter
- #1
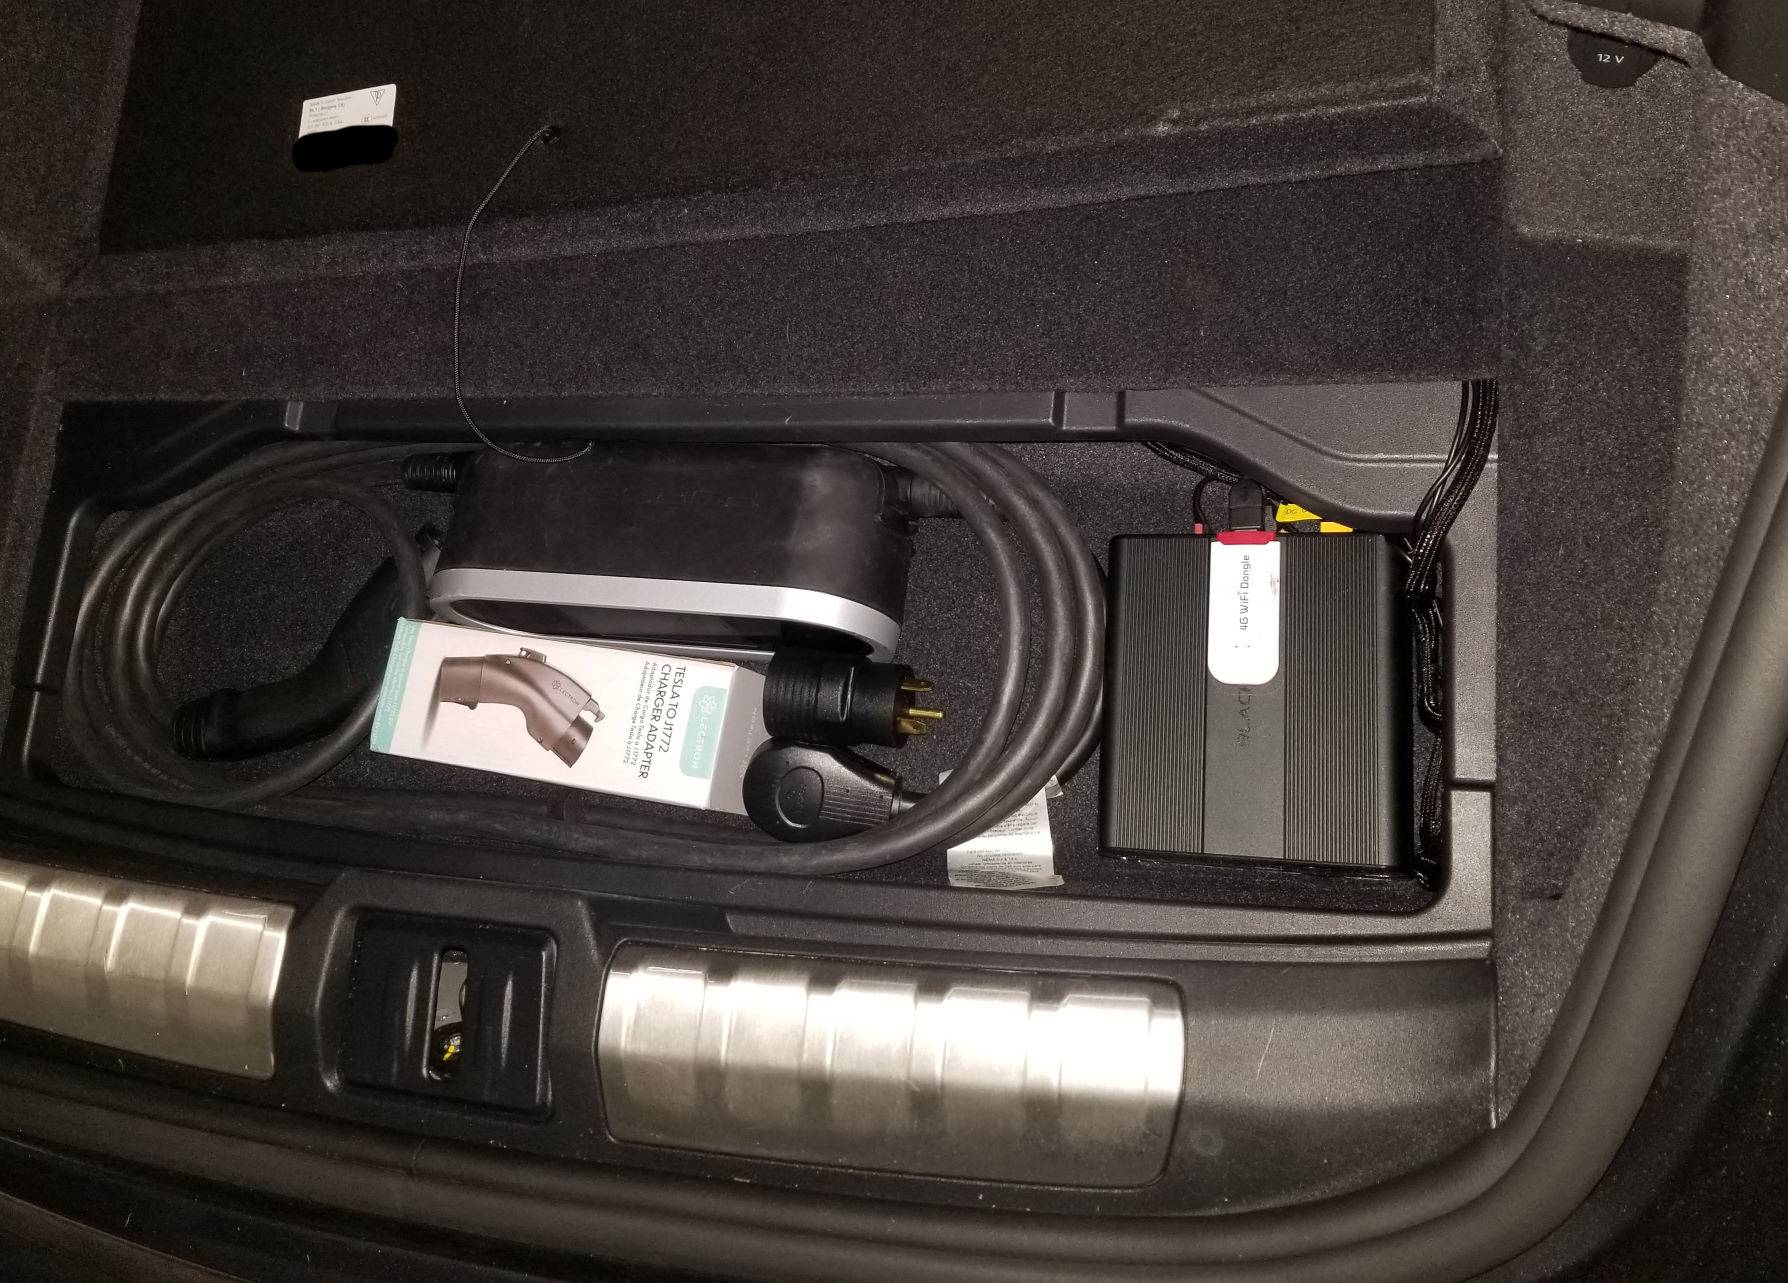
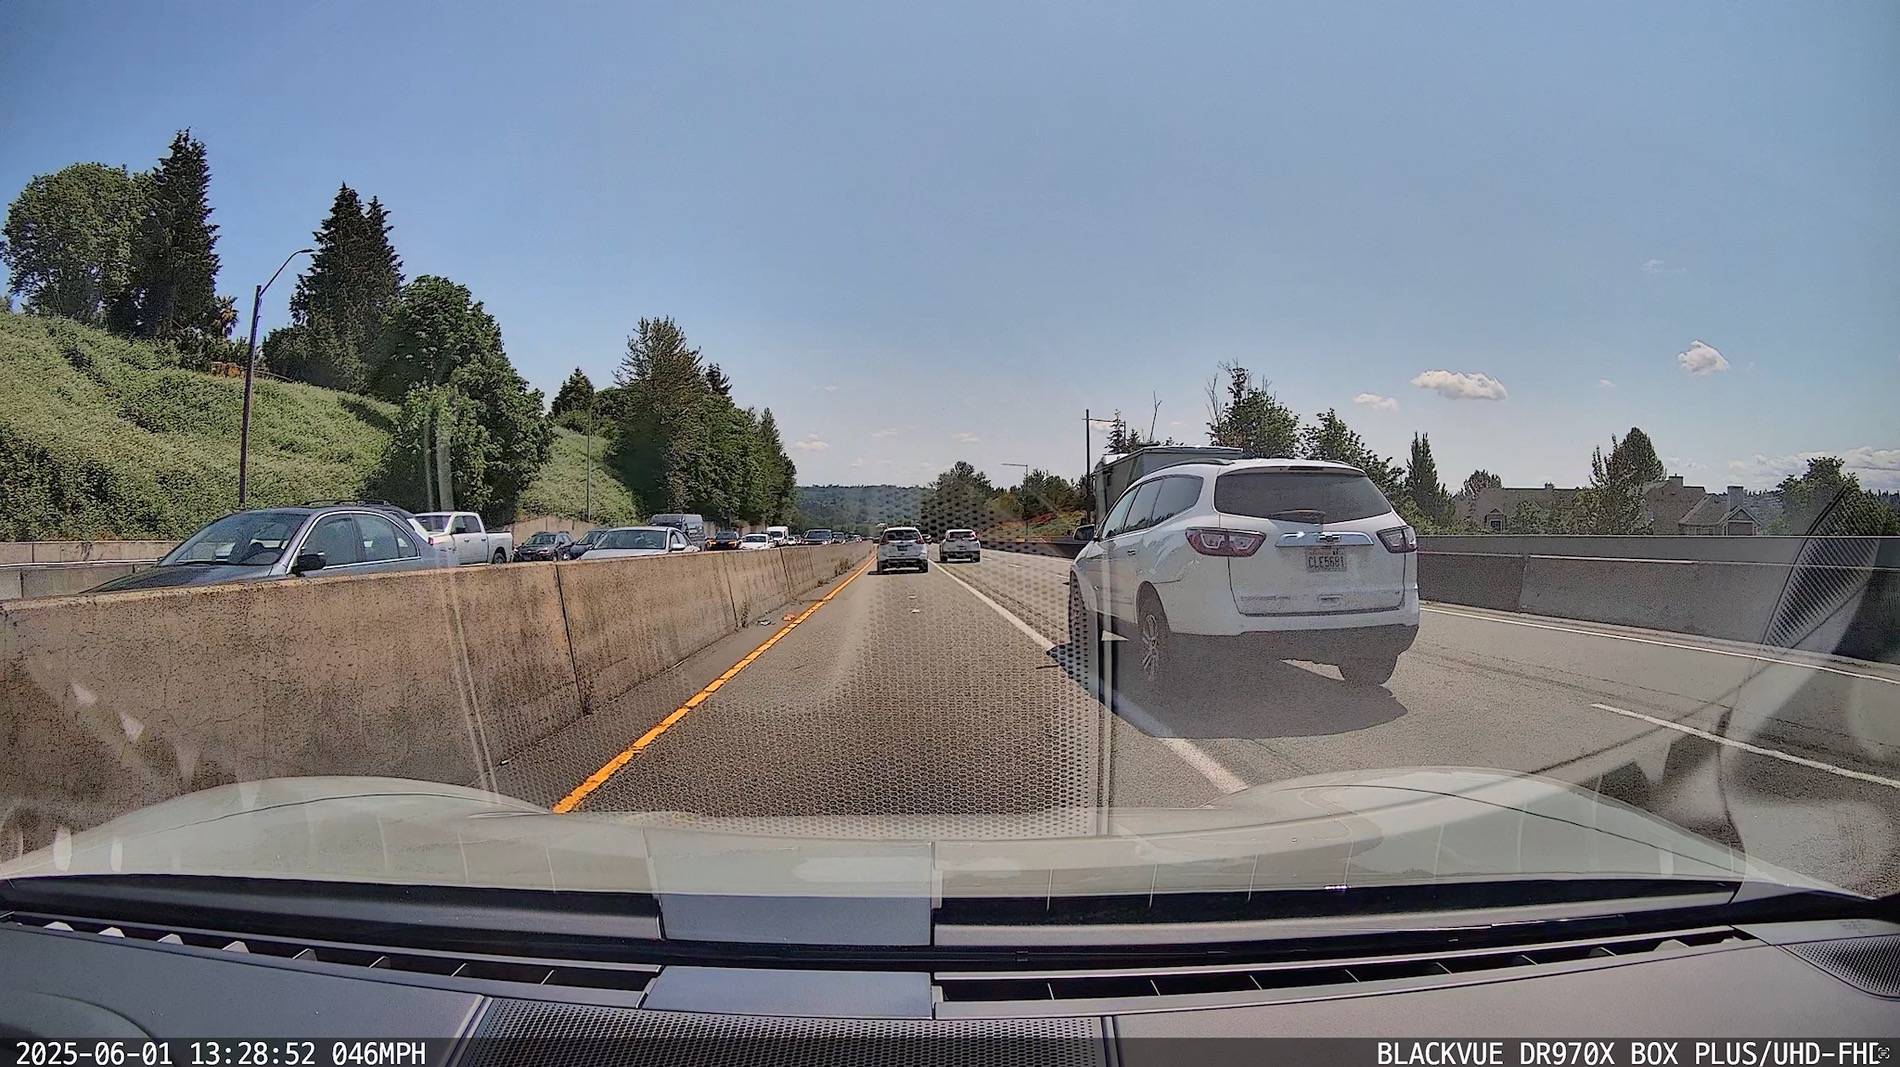
I just installed a front + rear camera with a battery (Blackvue DR900X 2ch + B-124X battery) tucked away in the trunk, and I thought I share some details of the installation  (btw. if you plan to do this yourself, get the newer DR900X Plus which has an improved image processor).

There are various options to power the dashcam:
Soldering is a bit of a hassle but not too difficult, here is a nice tutorial. And if you don't like to solder, you could always use crimping or nice heat-shrink connectors.
For the hardwired battery power connection, I bought two 17 feet, 14 AWG wires (red+black) from Home Depot and soldered it to the connector that was provided (do not use thinner wires as the charging is done at 9A). For the camera power cable, I soldered the Blackvue provided cable (with the B-124X) to the hardwire power cable that comes with the 900x camera to have enough length.
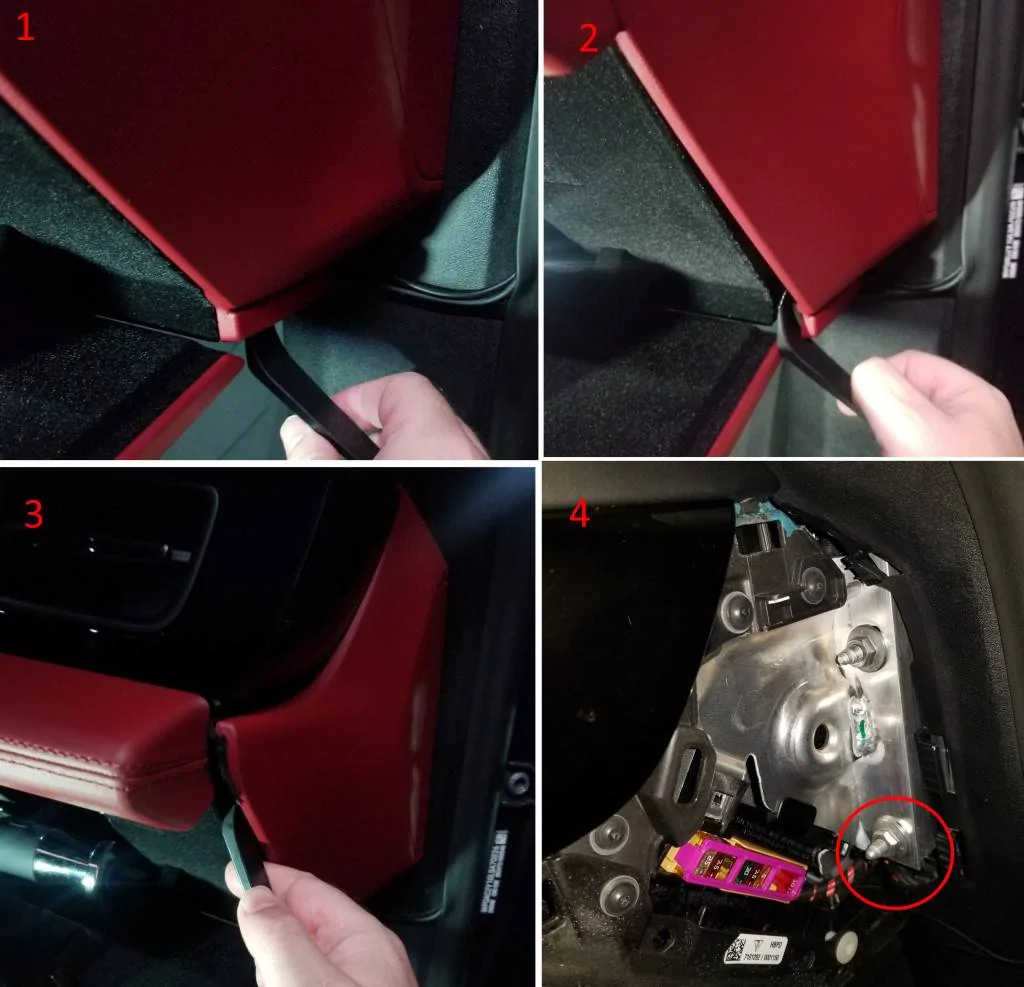
To remove the passenger side panel, work from the bottom to the top and it pops right out. This gives access to a ground screw:

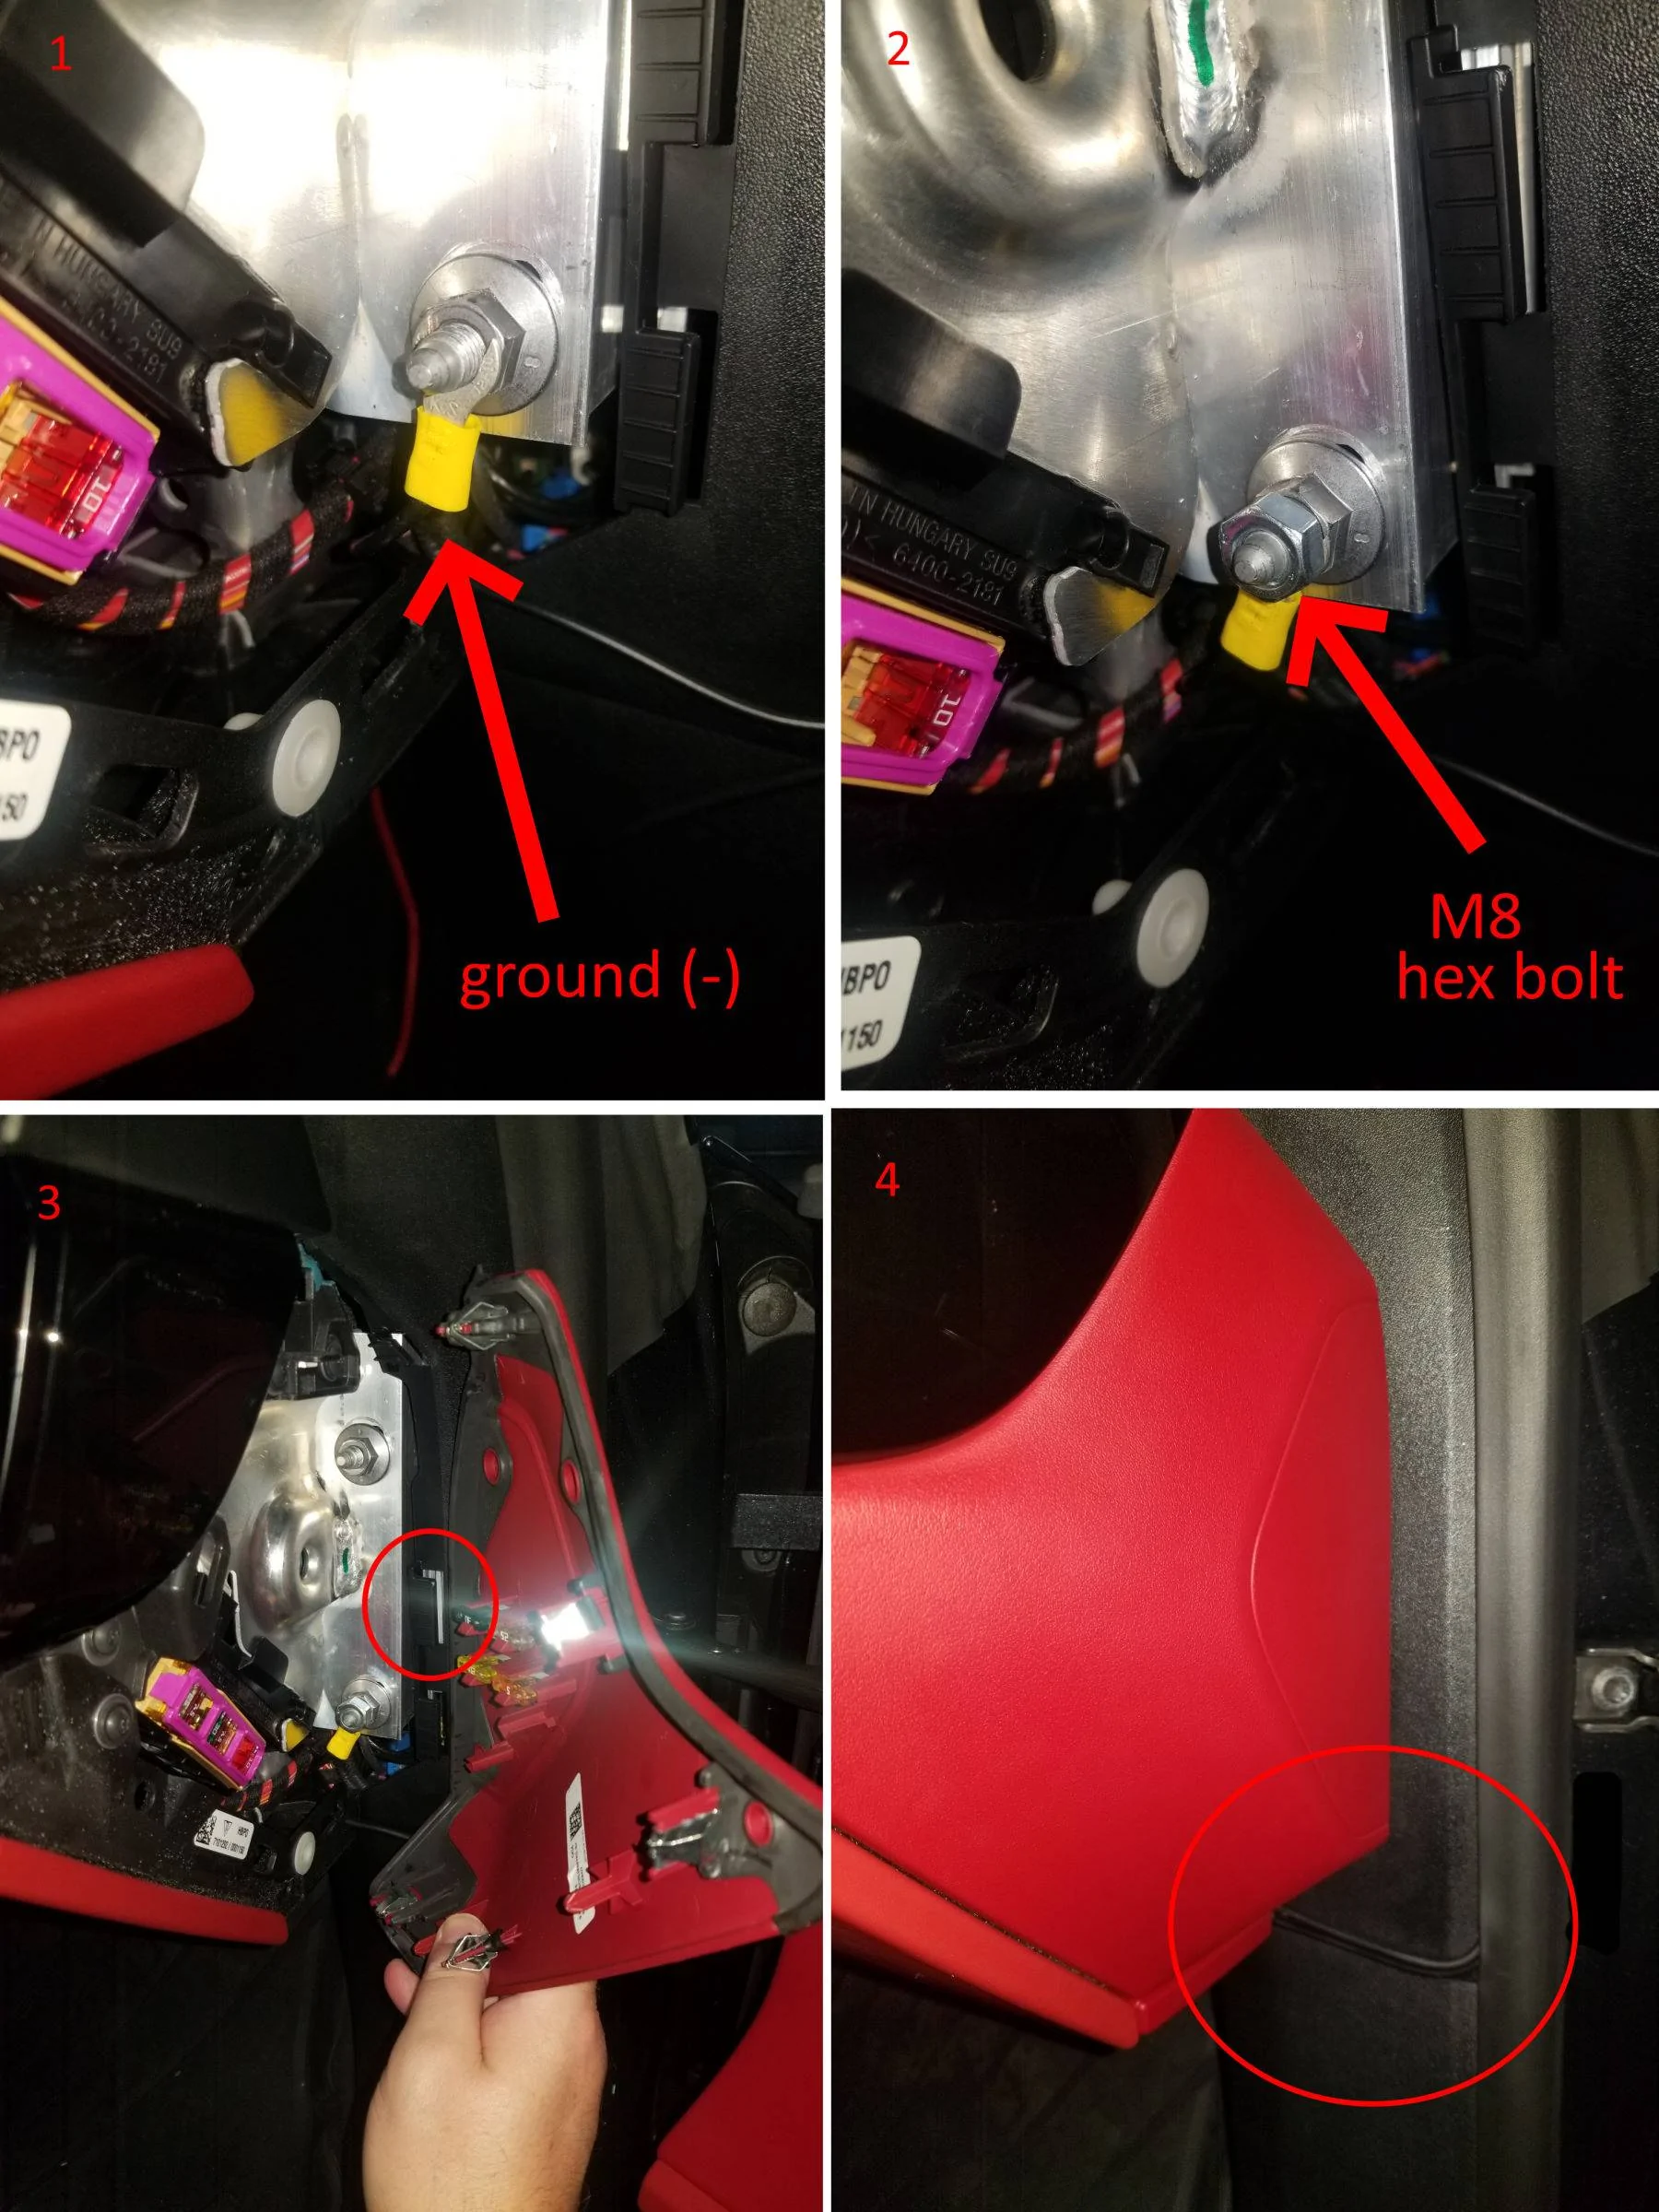
Then, attach the battery power ground wire, which you can do by using an M8 hex nut. That way there is no need to loosen the existing nut. (don't close the side panel until later to hide cables better)

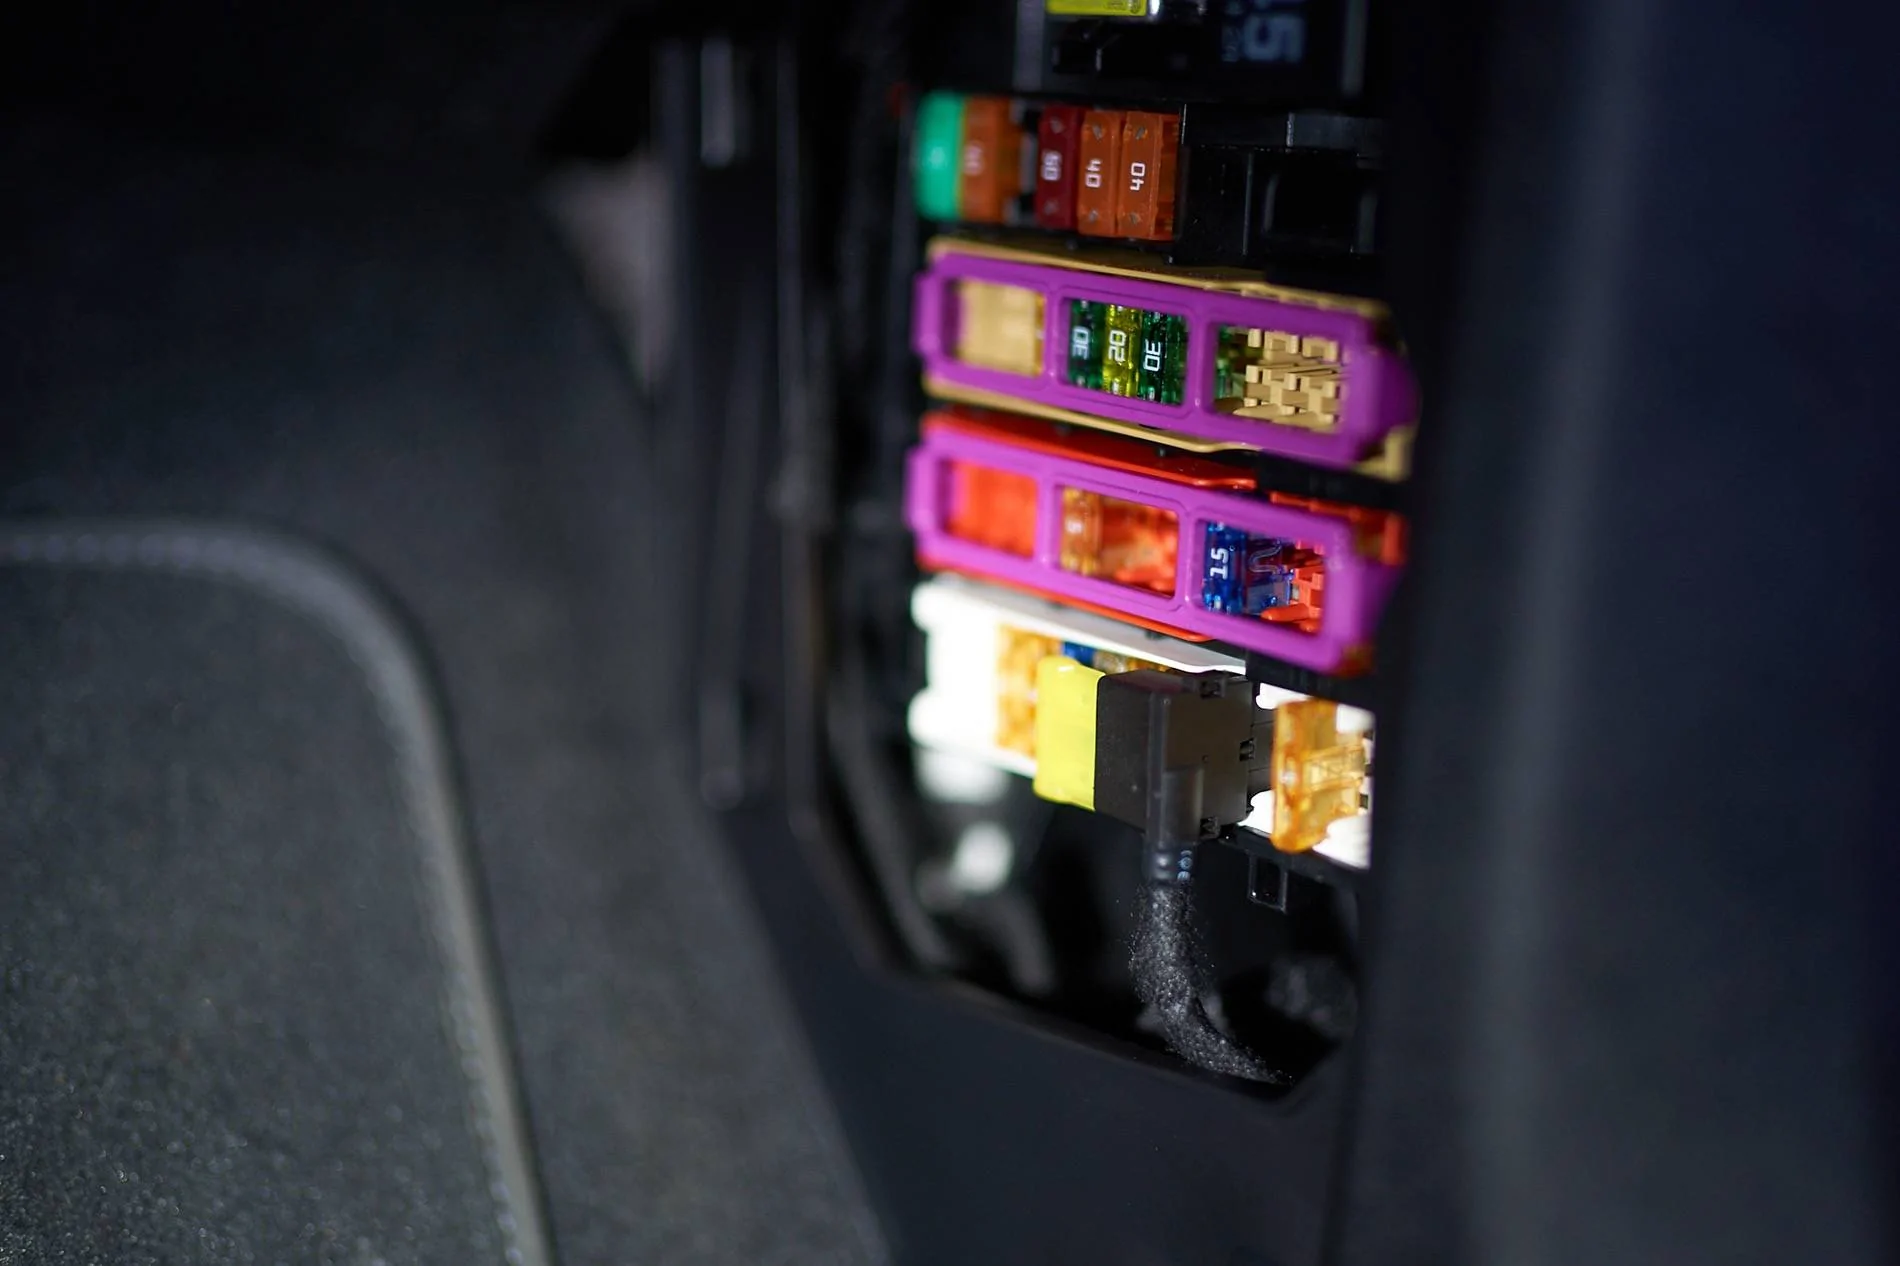
After this, remove the fuse box panel in the passenger footwell :

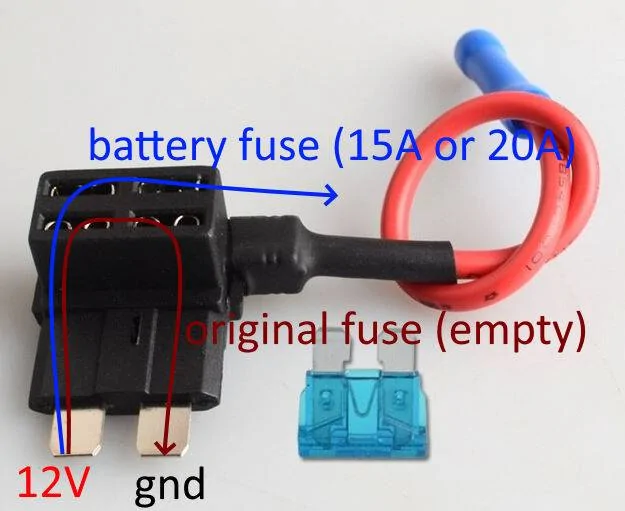
The fourth fuse slot from the right at the bottom row is unused, but gets powered only when the car is on, just what we need. (The manual says this fuse location is only used for "right-hand-drive" vehicles to power the BCM control unit). Use the fuse-tap that comes with the B-124X and the provided yellow ATC 20A fuse (actually, if you have a blue 15A fuse that would be a bit better as charging is at most done at 9A).
Place the new fuse at the top of the fuse-tap and leave the bottom one empty (as it is an unused fuse slot), and attach the red acc. cable for the battery to the fuse tap using the provided crimp connection using a crimping tool. Insert the fusetap "downwards" as shown in the picture since only the top row of the fuse panel is powered. (don't close the panel until later so you can route cables nicely).

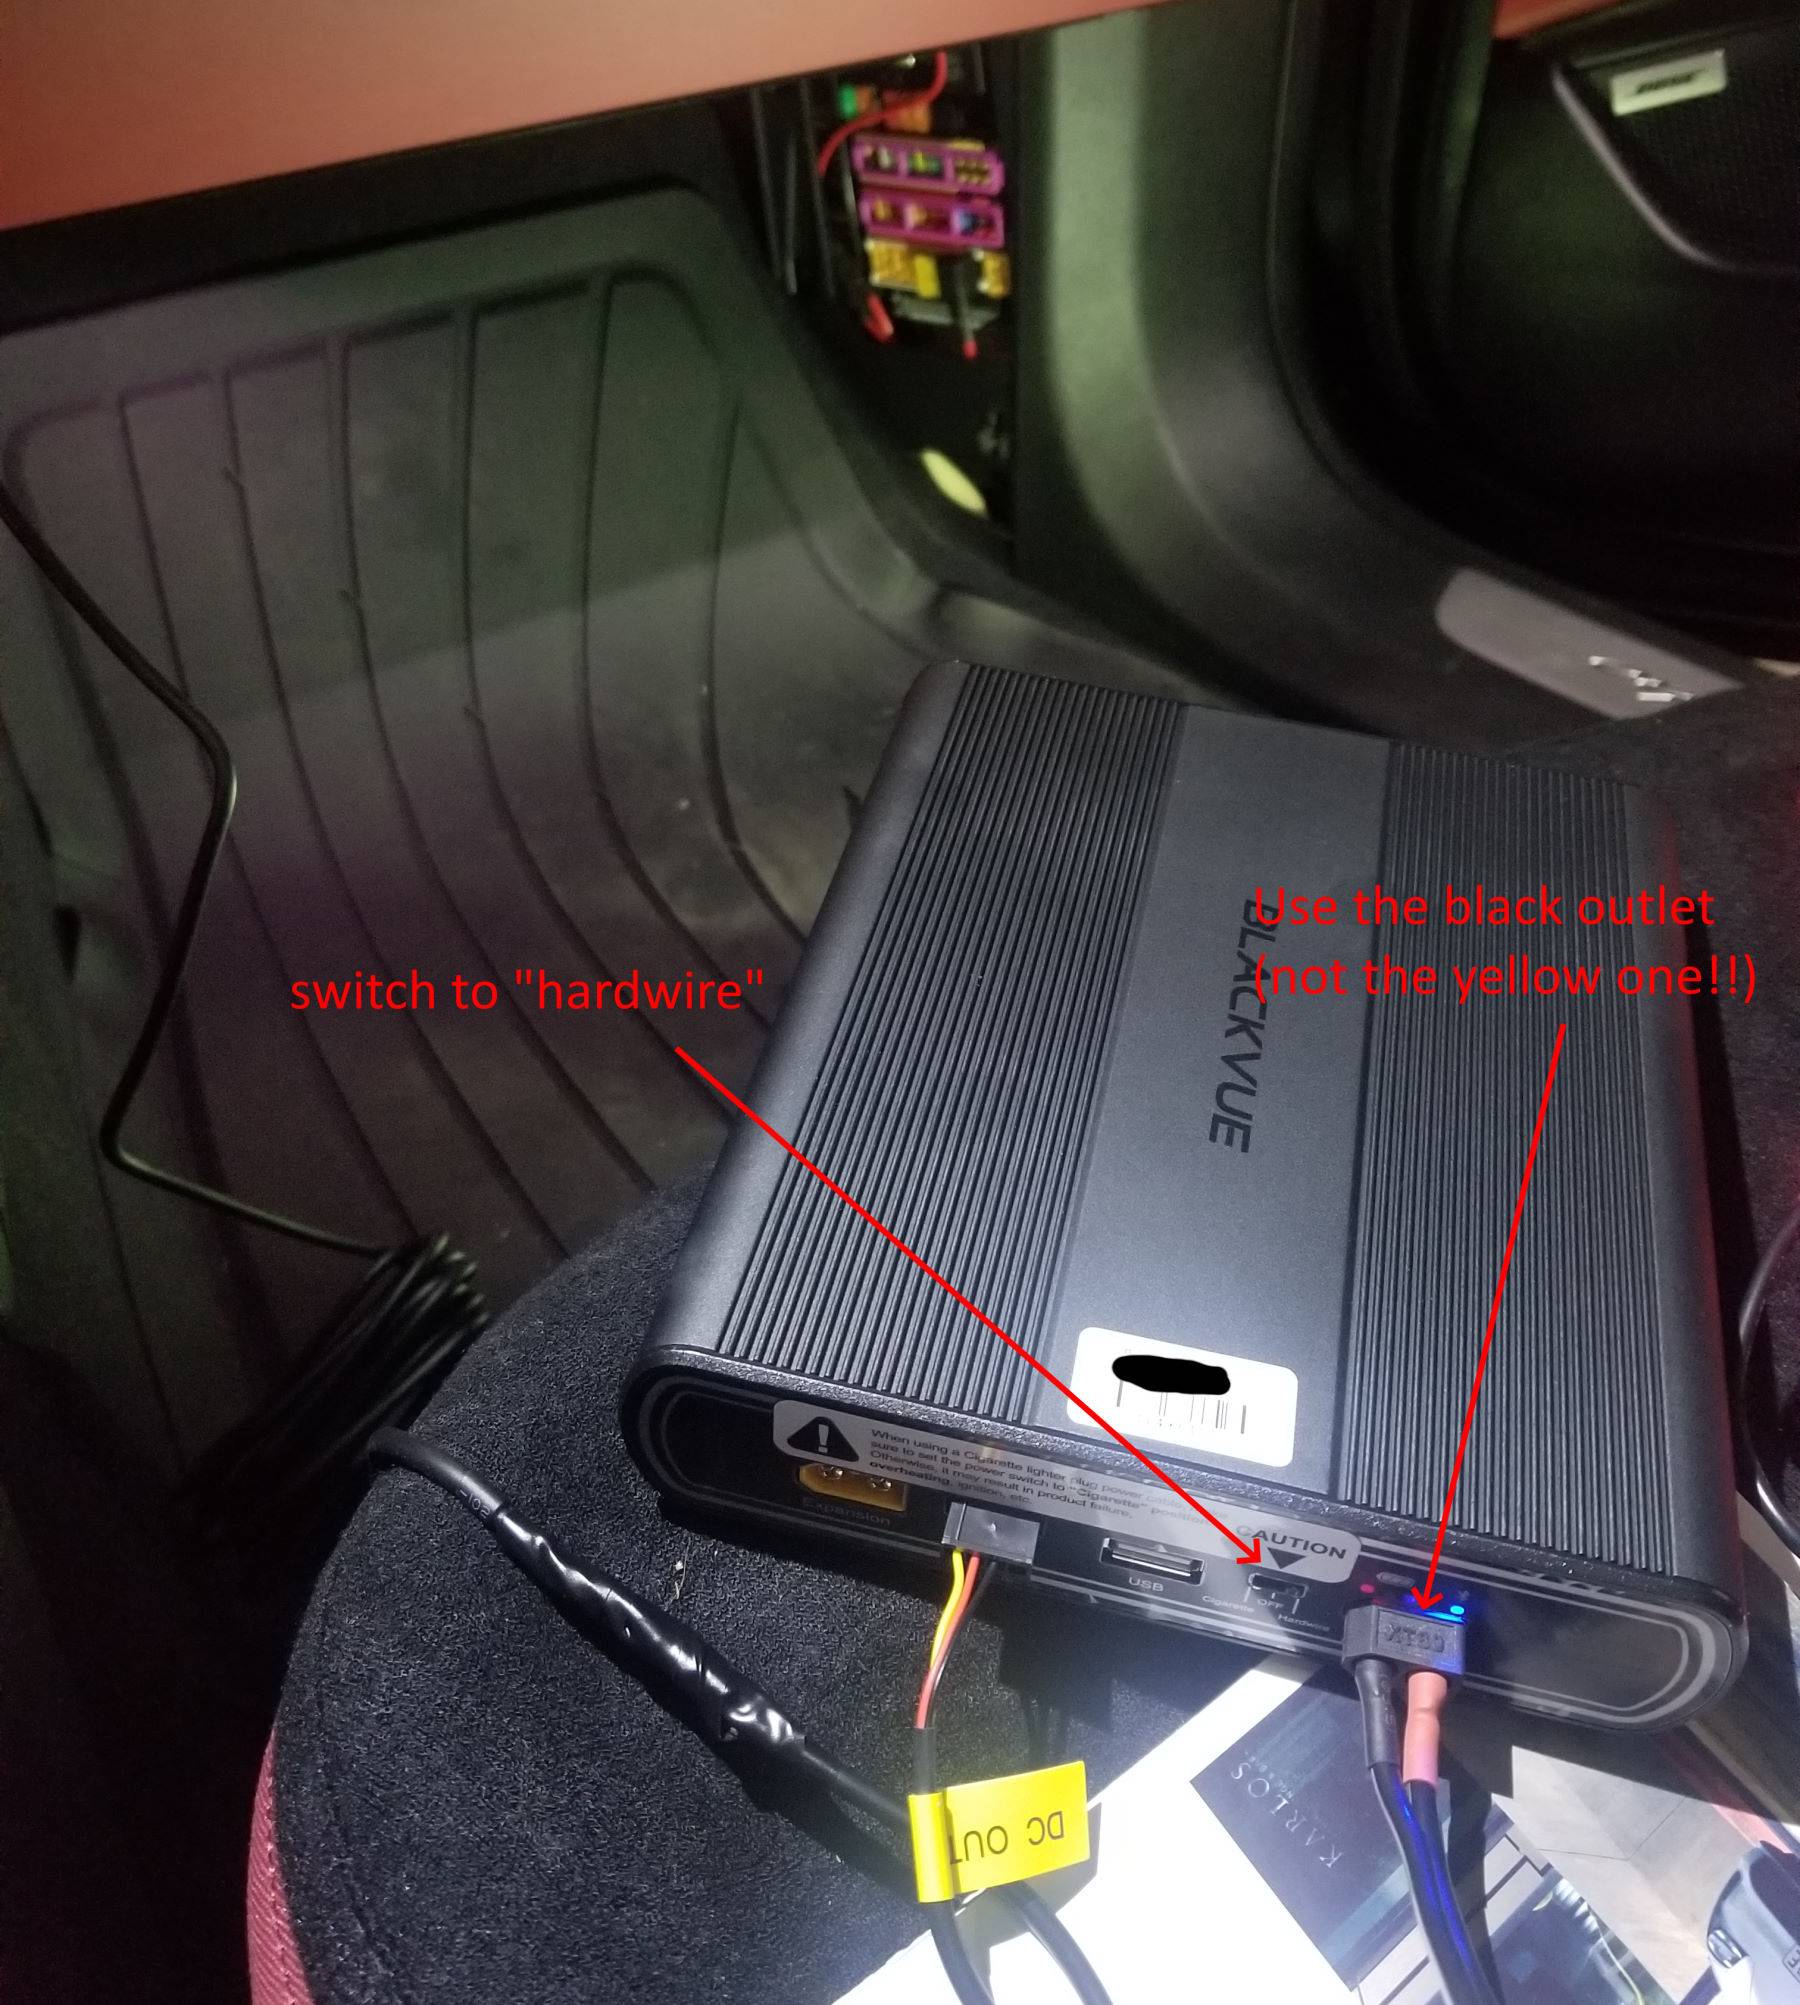
Now test if the hardwired setup is working by directly attaching the B-124X and the camera:

You can connect with bluetooth to the battery (using the app) to see it charge when the car is turned on, and drain when the car is turned off. (in my case, the new battery was completely empty so needed to charge for a few minutes before bluetooth started working).
If it all worked, we can then route the camera power cable, the rear camera cable, and the hardwired battery power cables all the way to the back. I think the best way is on the bottom of the car next to the seats under the plastic panel there -- can be done just by pushing under it. (I did not remove any panels).

Quite a bit of work, but happy how it turned out
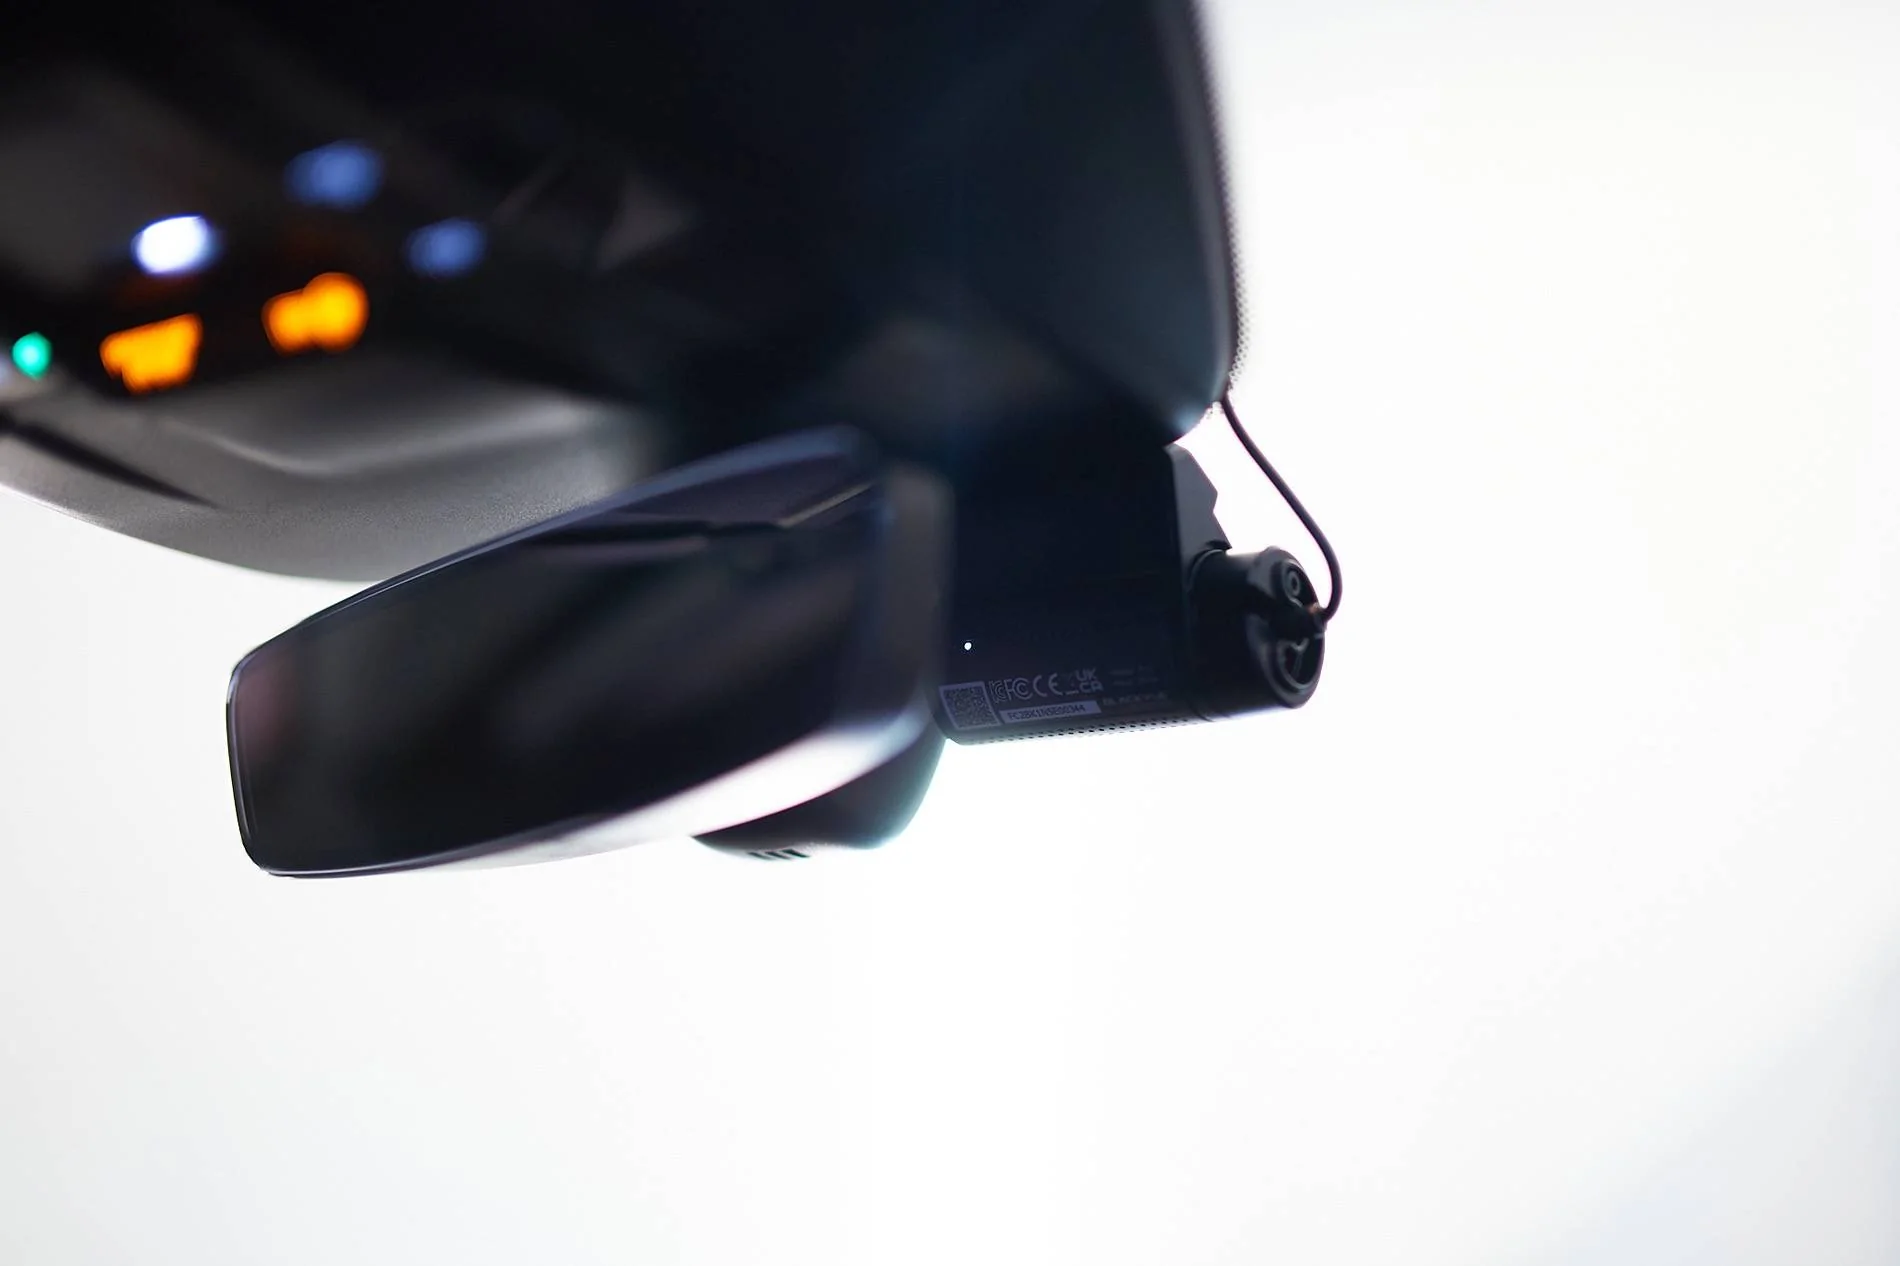
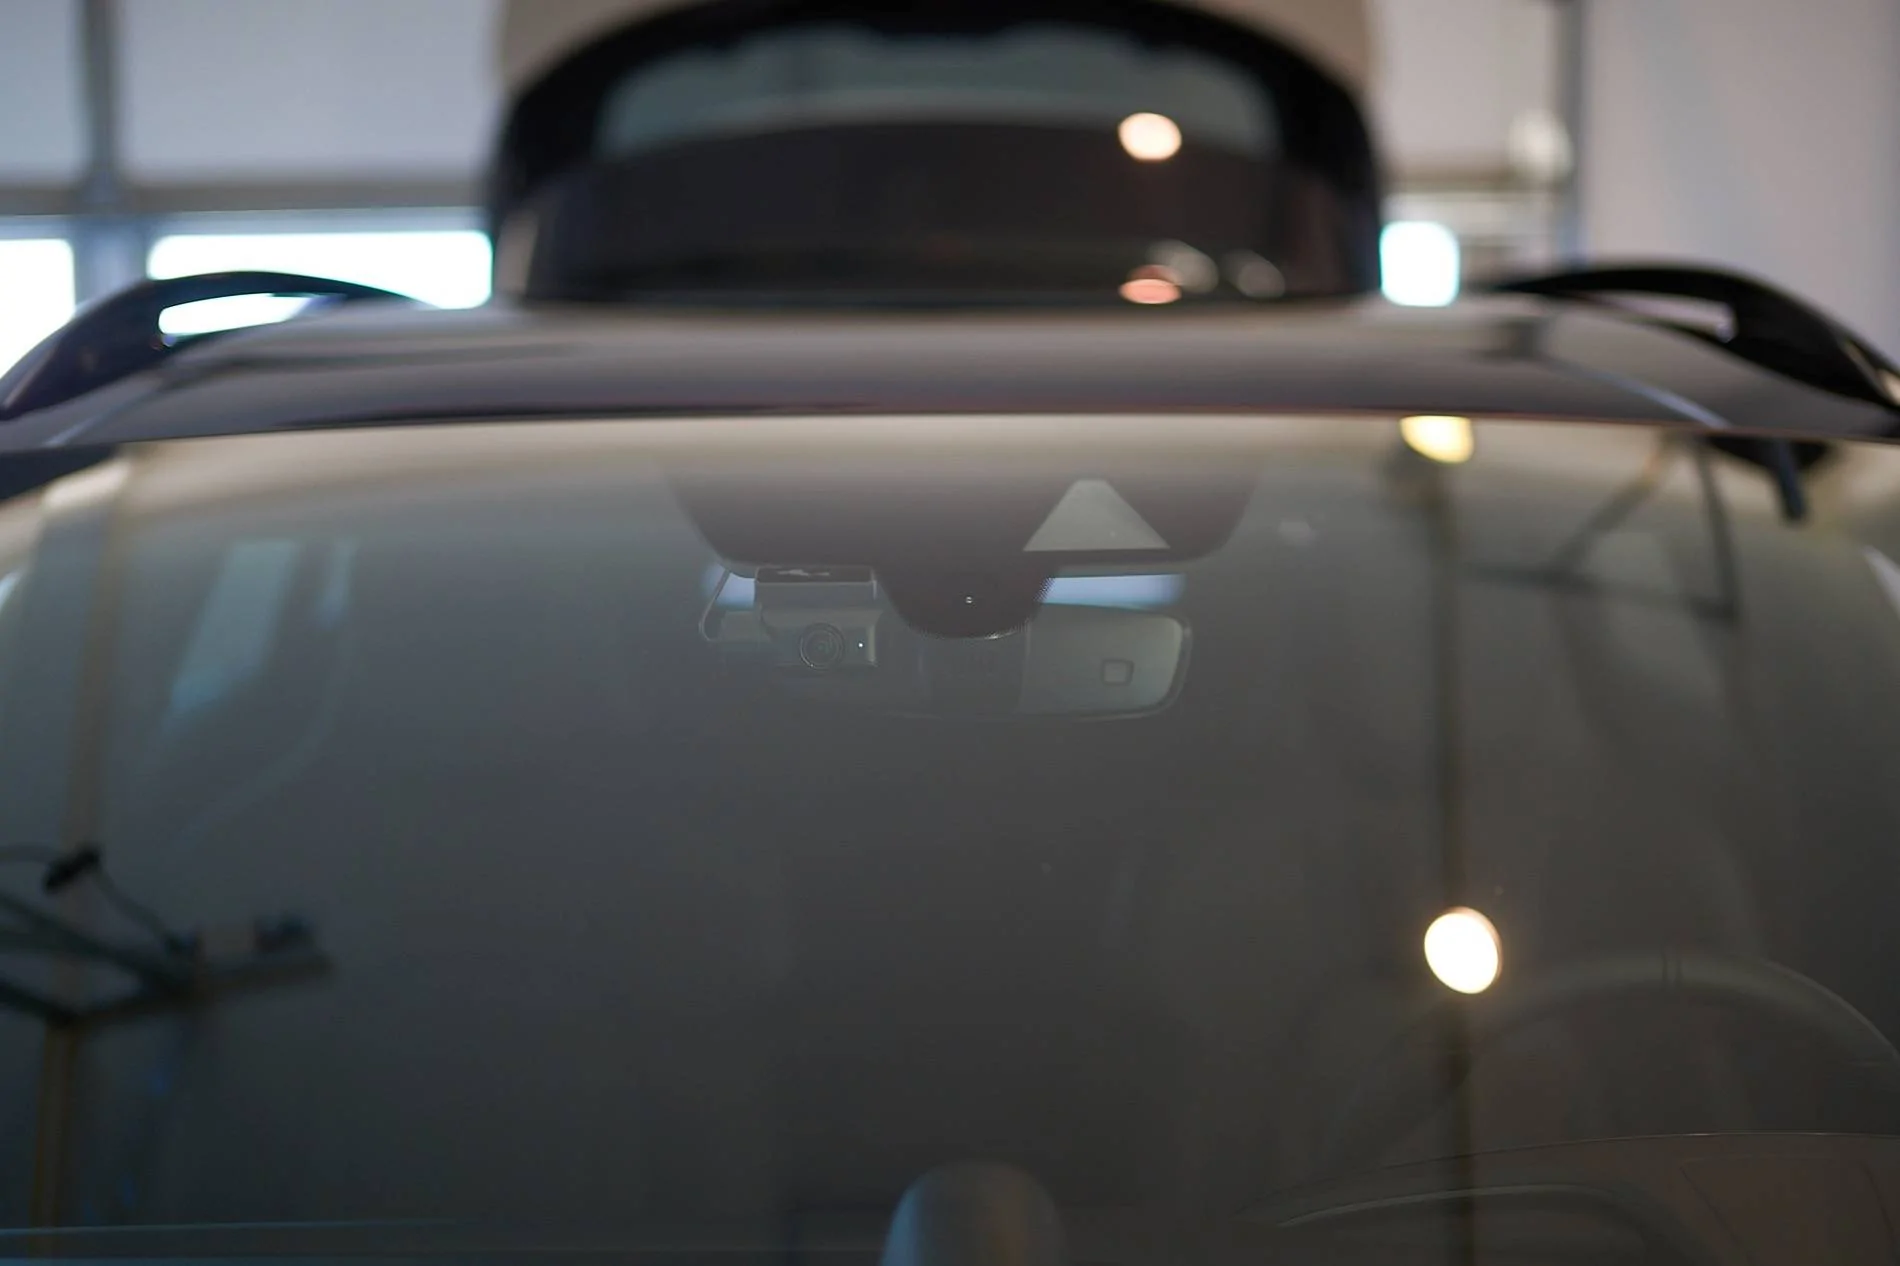
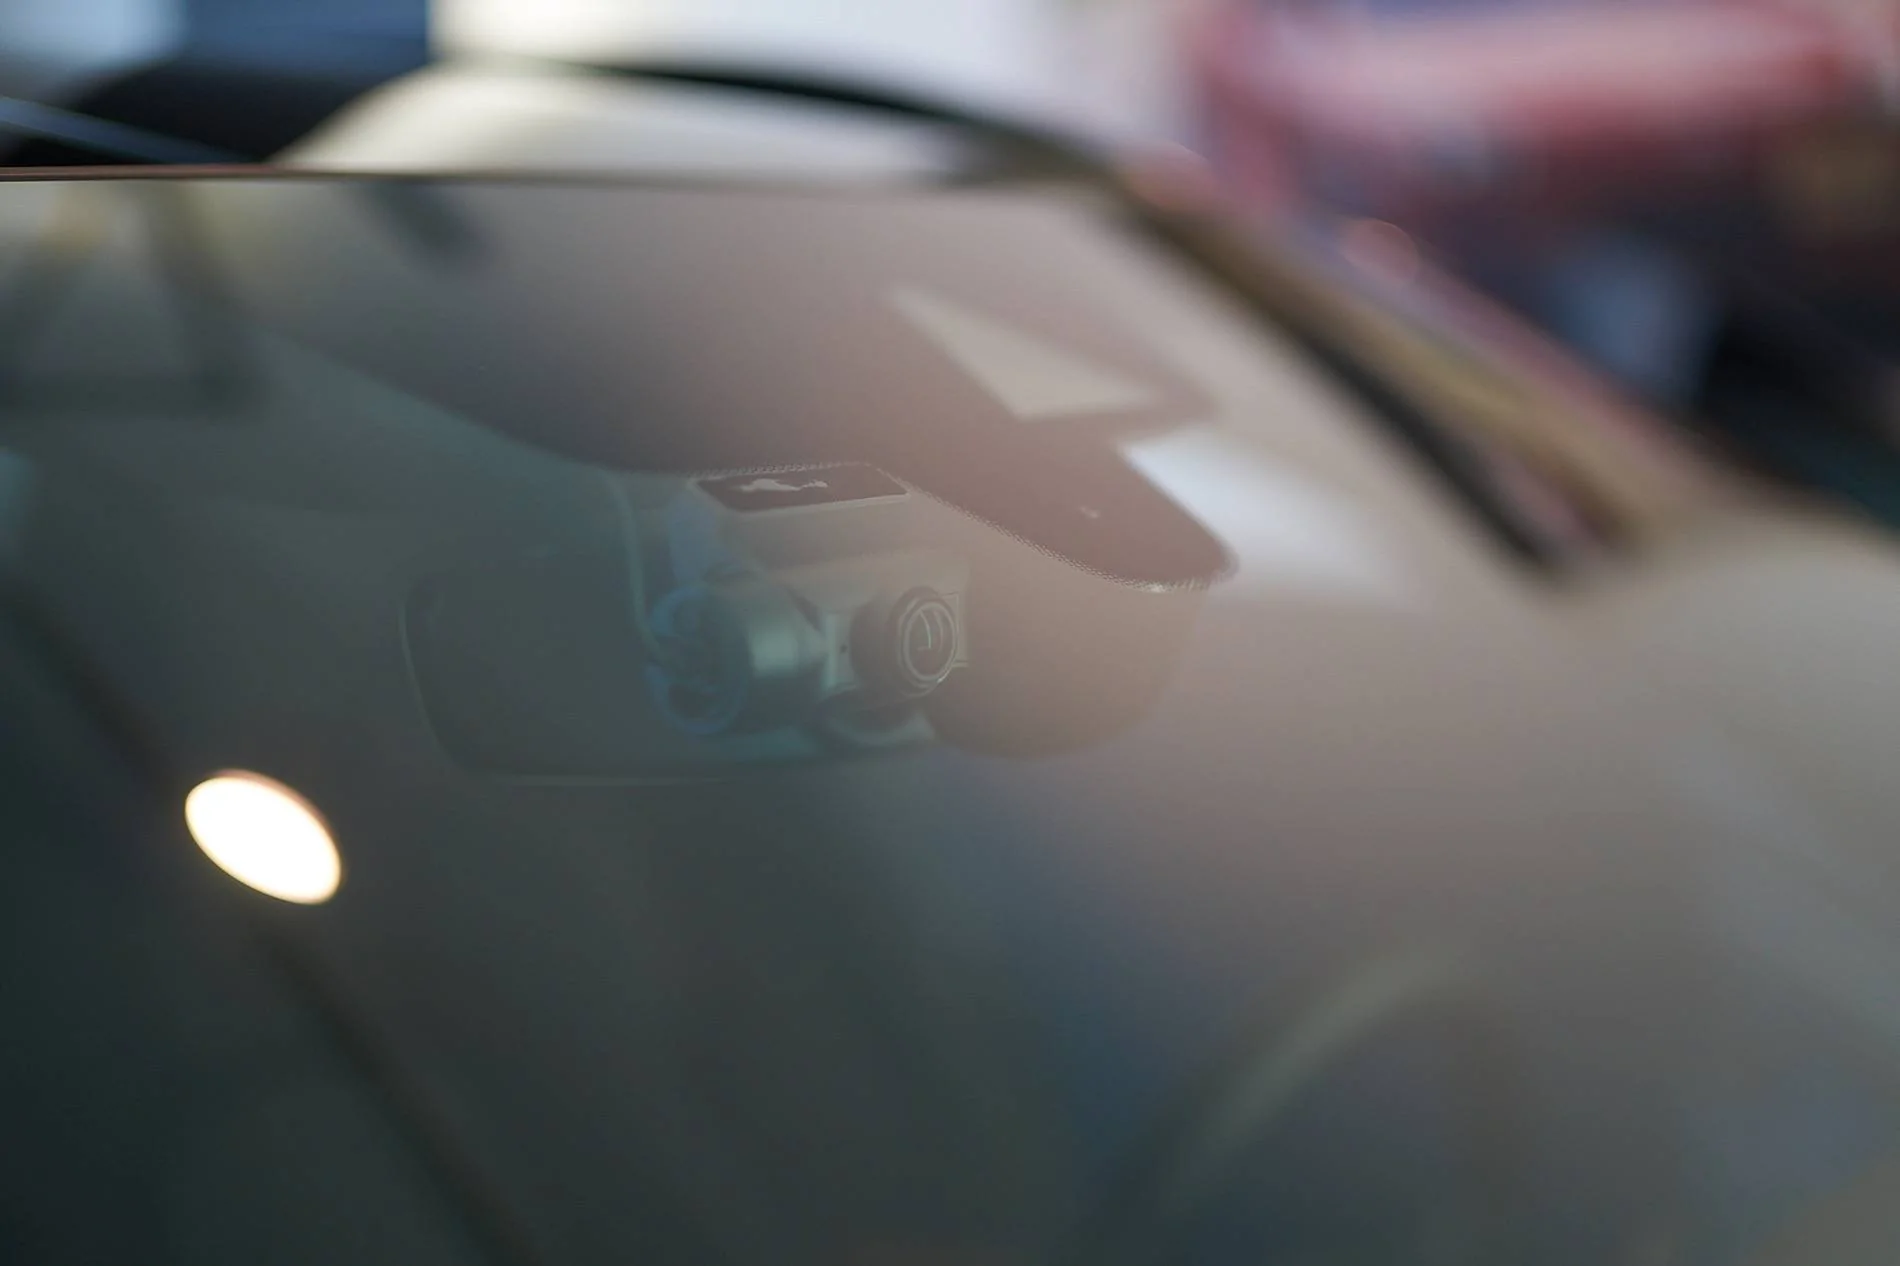
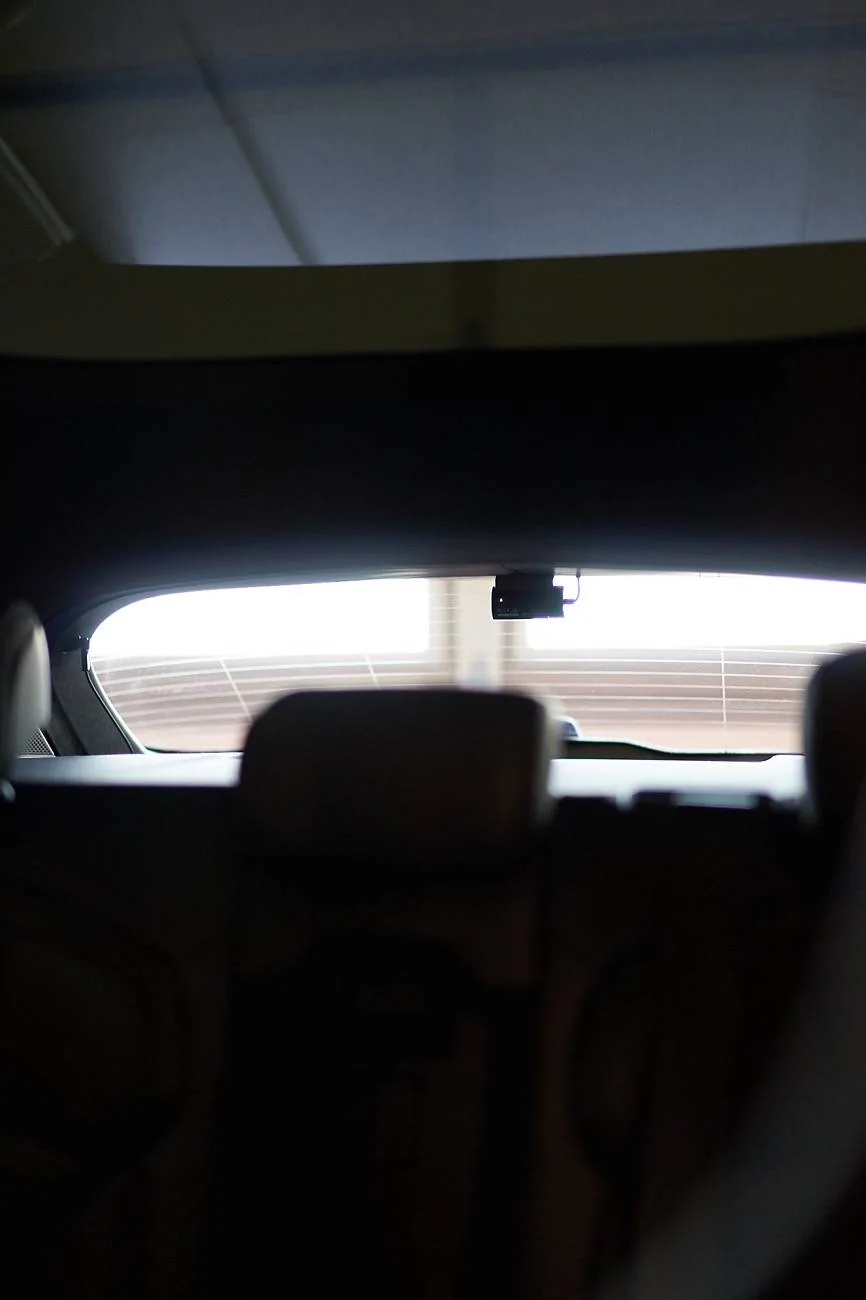
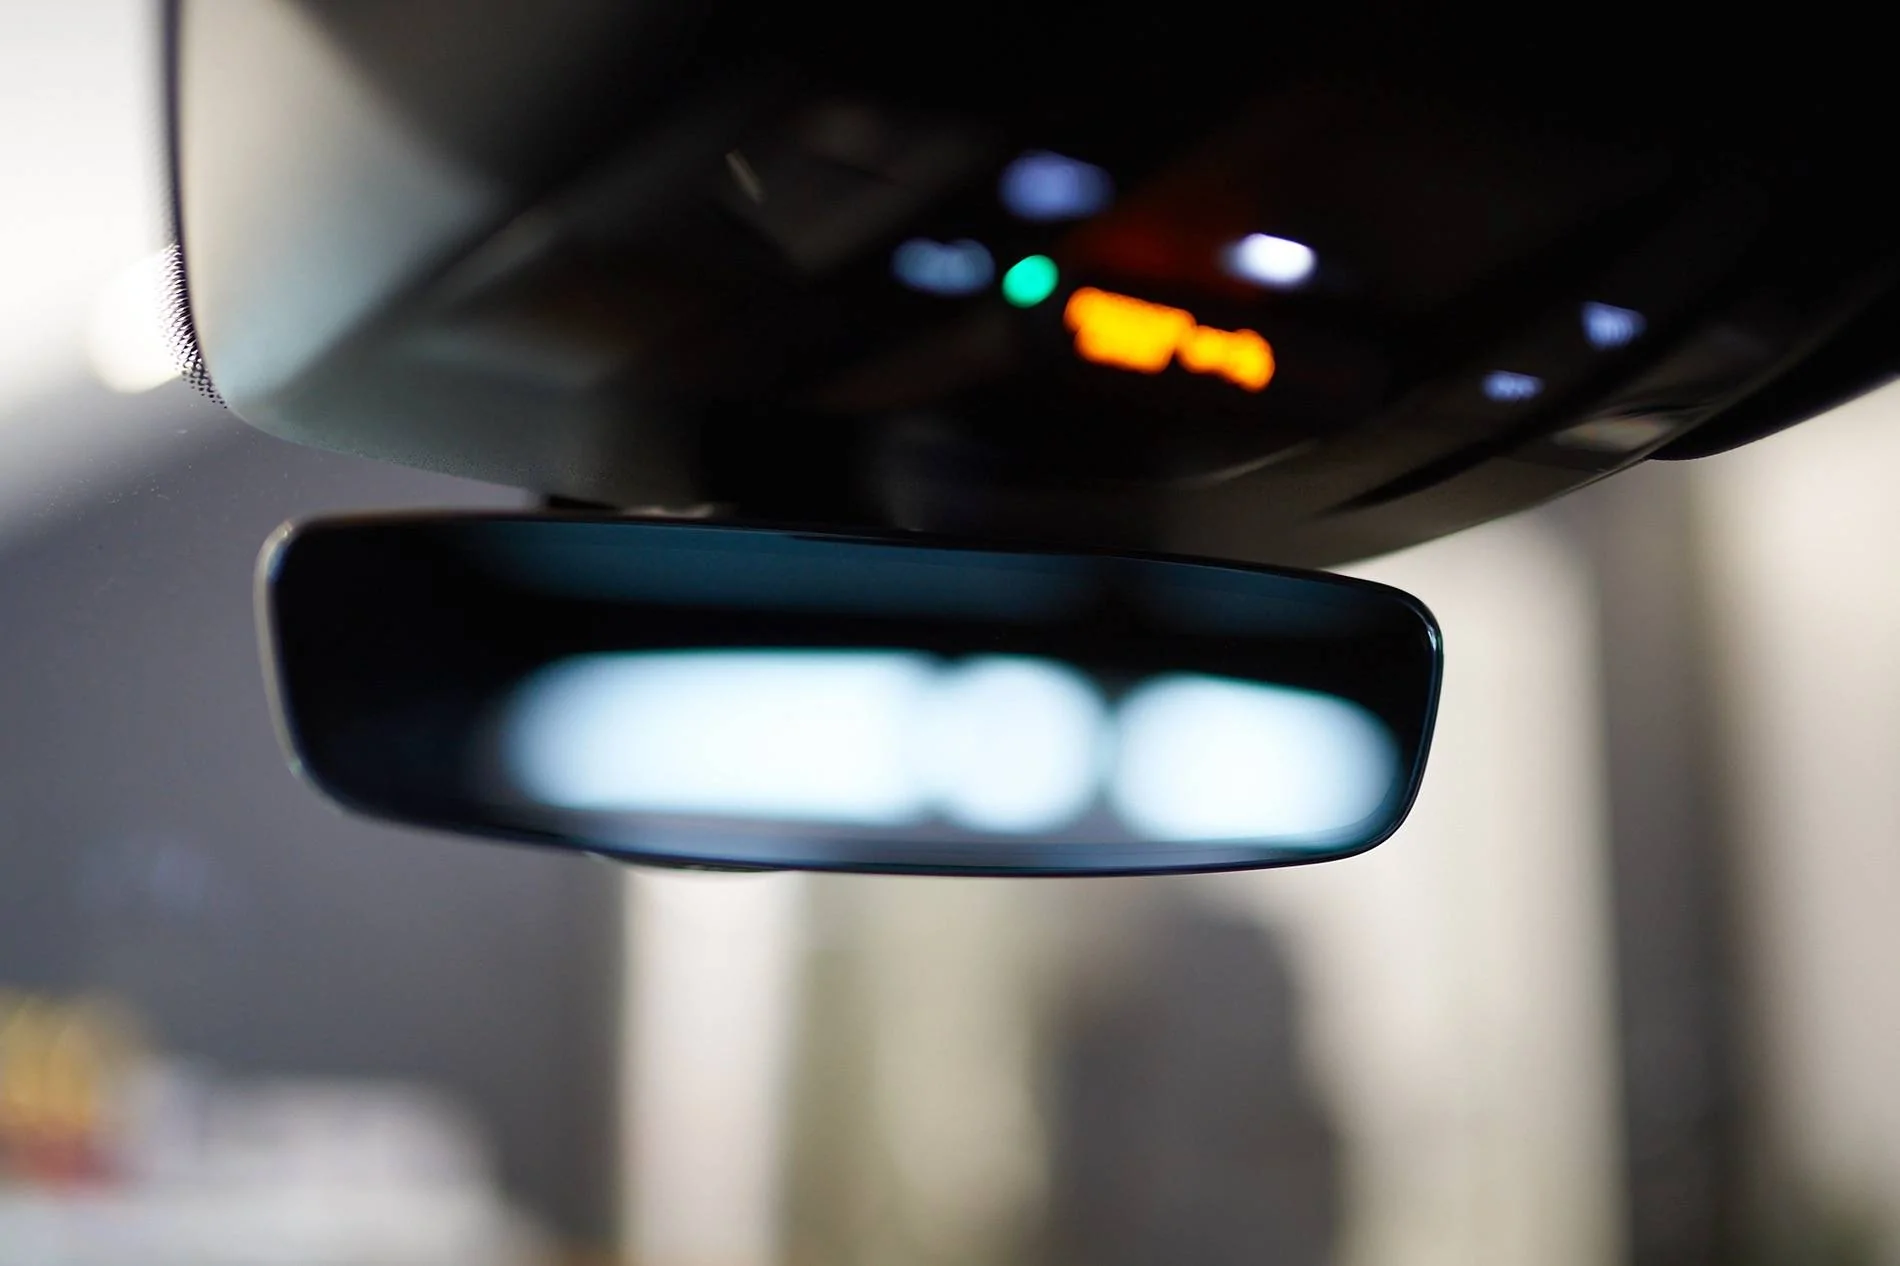
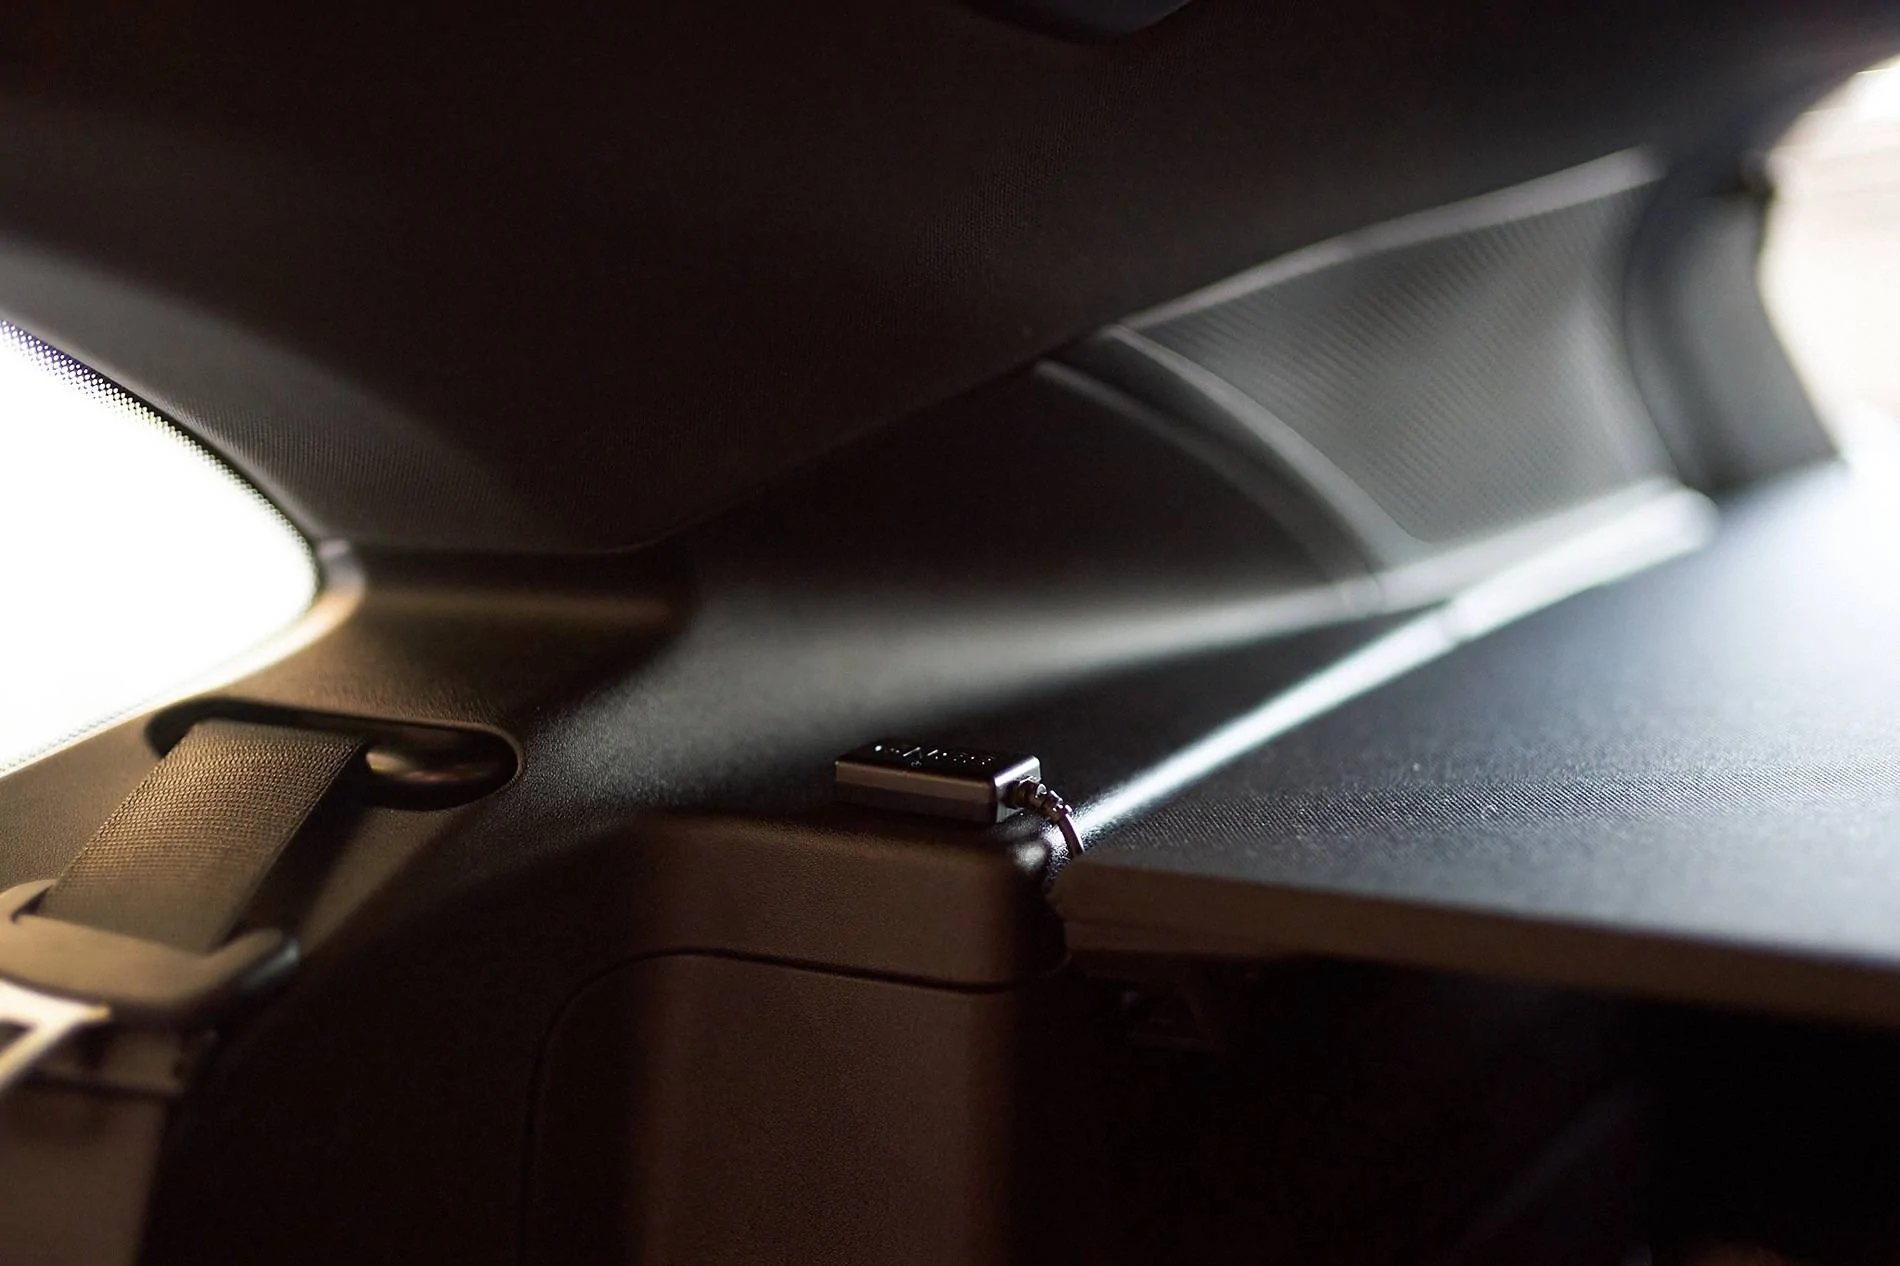
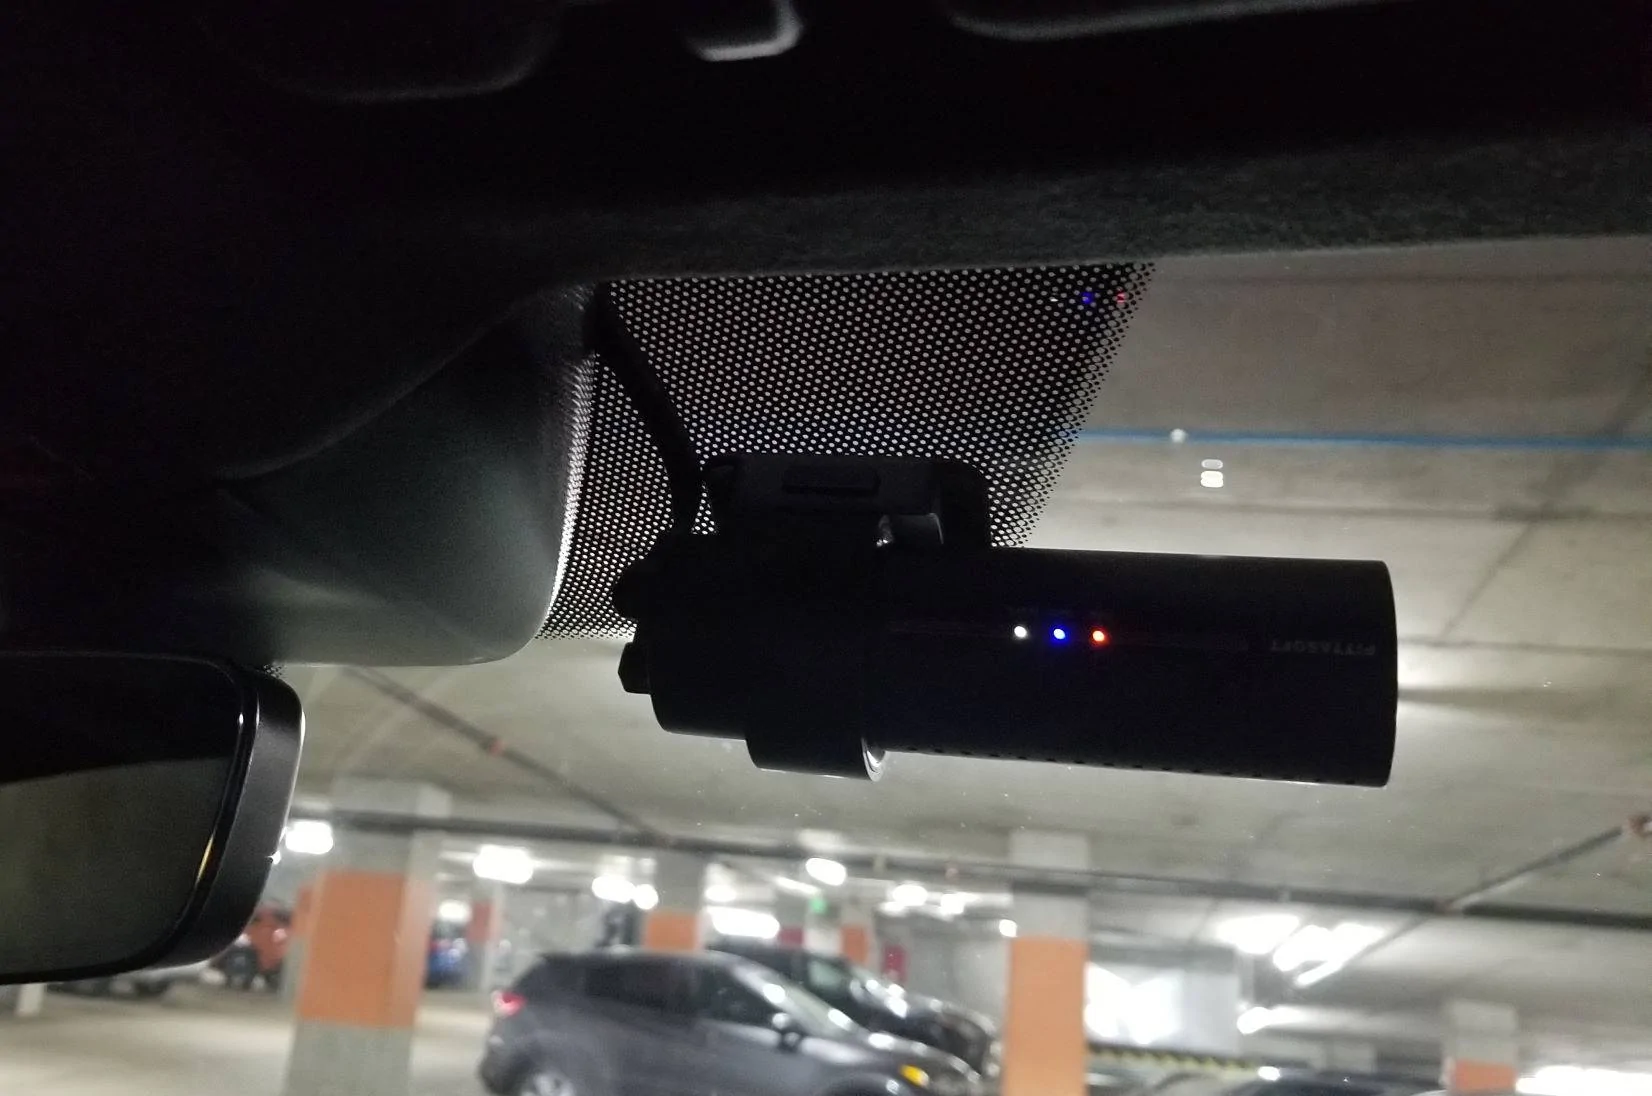
edit: 2022-10-30: it turned out that the camera could not receive a GPS signal at the installed spot as shown above (1). I think this is due to the thermally and noise insulated glass perhaps. I needed to remove it (use the plastic tool again to force it off and use thinner/turpetine to remove the glue residue), and reinstall the camera inside the dotted area:

unfortunately that makes it more visible and less centered but overall it still looks fine; I tried other areas but this one is the only one that had reliable gps reception. (here is another thread that uses a similar location -- that one is a tad more to the left but then you will get the black dots into the view).
(btw. if you plan to do this yourself, get the newer DR900X Plus which has an improved image processor).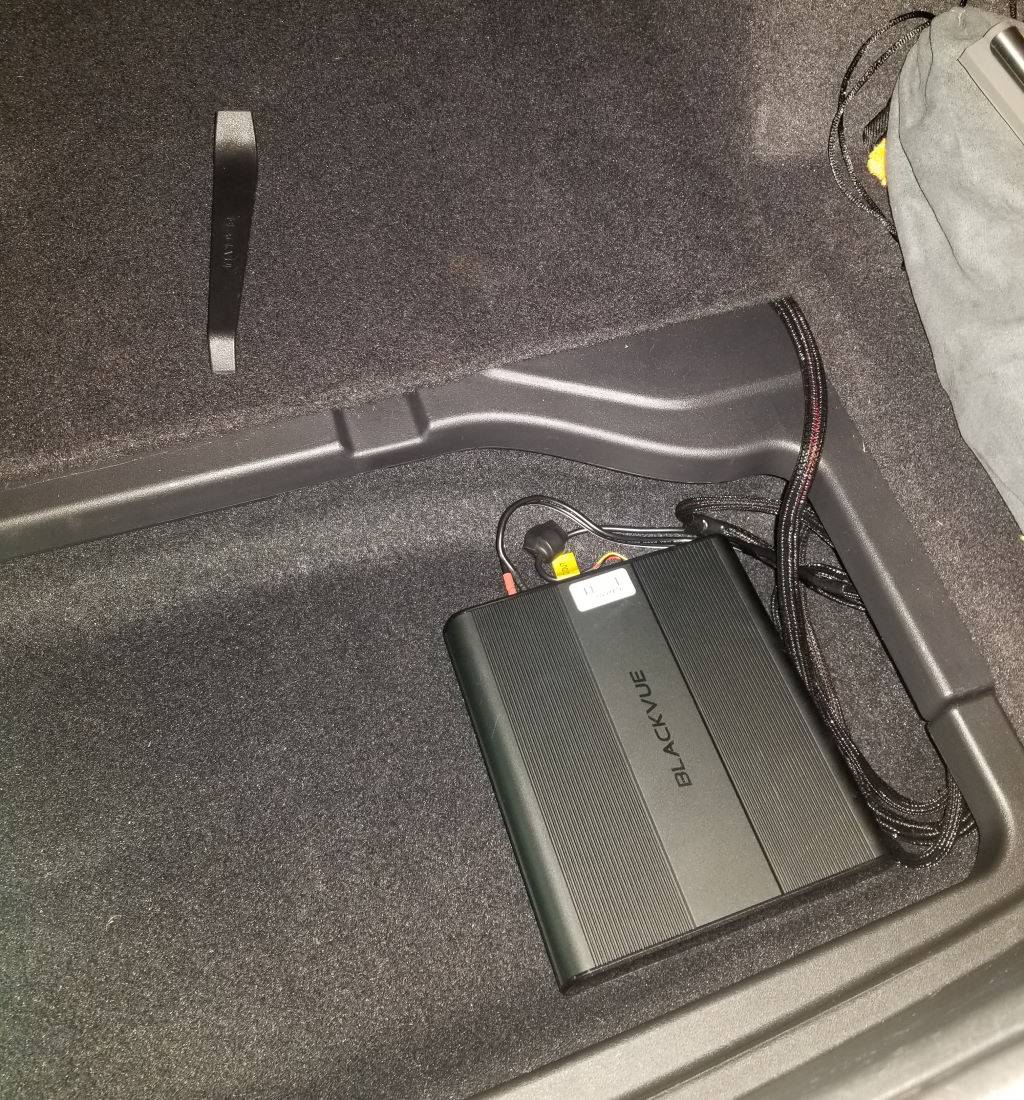
There are various options to power the dashcam:
- Use the cigarette plug -- this is the easiest but once the car is off it will only record for about 30min.
- Hardwire the dashcam to the fusebox of the car: this way the camera can keep recording powered by the 12v battery of the car. Now, in theory this is the most elegant solution -- if the car will keep charging its internal 12v battery from the high-voltage battery, the camera can keep recording for a loooonnng time (weeks, months?). However, if somehow the car fails to keep charging the 12v battery while off, then there is a lot of trouble as one cannot open or start the car anymore :-( (This used to happen with older Taycan models, and still seems to be the case if the HV battery drops below 10%). I personally don't want to risk this, so, option 3:
- Use a separate battery just for the camera (the B124X) which can power the camera for about 18 hours. This battery is hardwired to an "ignition" fuse so it is only charged from the car 12v battery when the car is "on" -- no risk anymore to drain it.
- hardwire it in the passenger footwell with an easy cigarette lighter connection to power the camera (see this thread where the battery is put under the passenger seat)
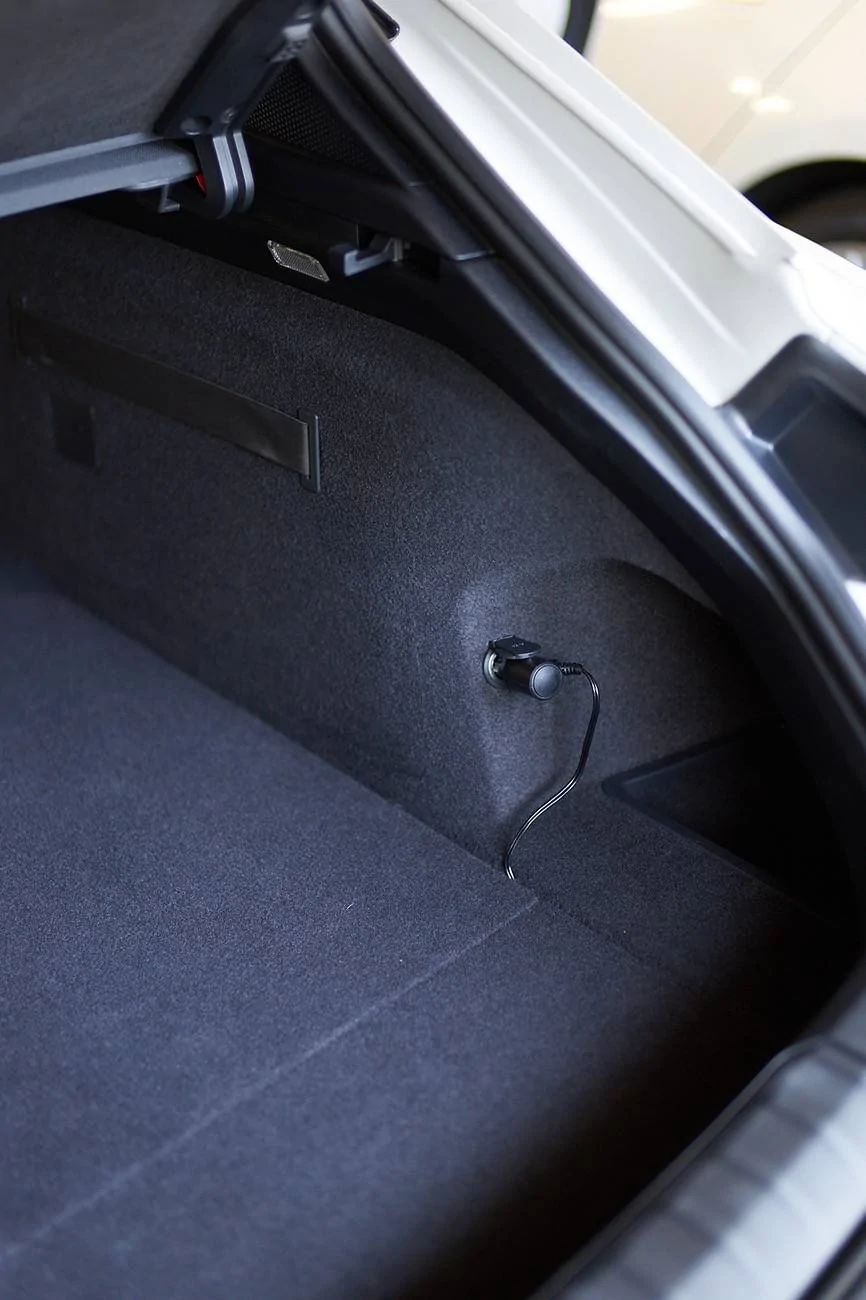
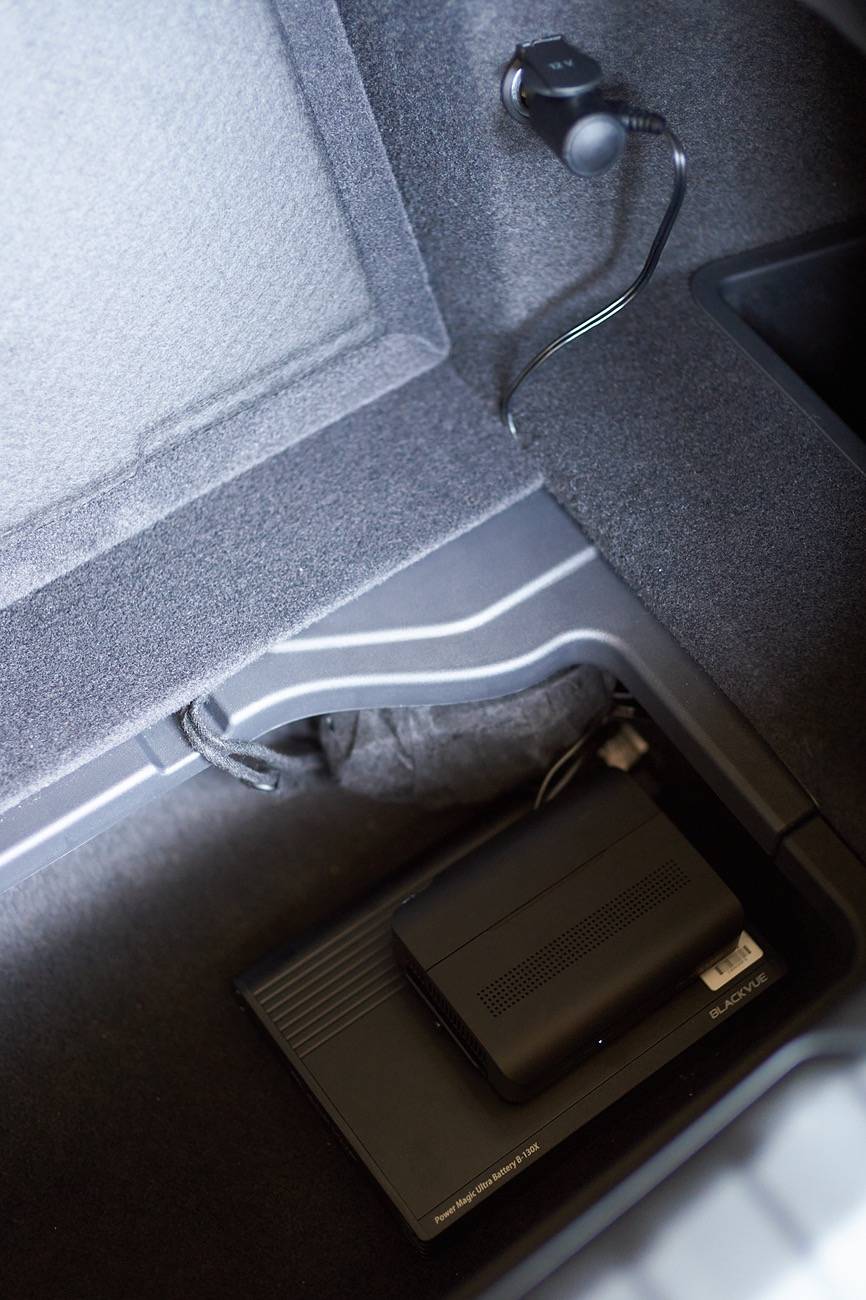
- Use an extended camera power cable, and place the battery in the trunk using the 12v cigarette lighter outlet there to charge the battery (see this post for an example). This is still a bit risky though: after turning off the car, the camera battery will charge from the 12v car battery for about 30 minutes -- but it will draw more power than just a camera (5A vs. 0.4A) and that may drain the 12v car battery perhaps... well, in theory as the car should charge the 12v battery from the high-voltage one. So it should be ok, but again, for me I do not want to risk this.
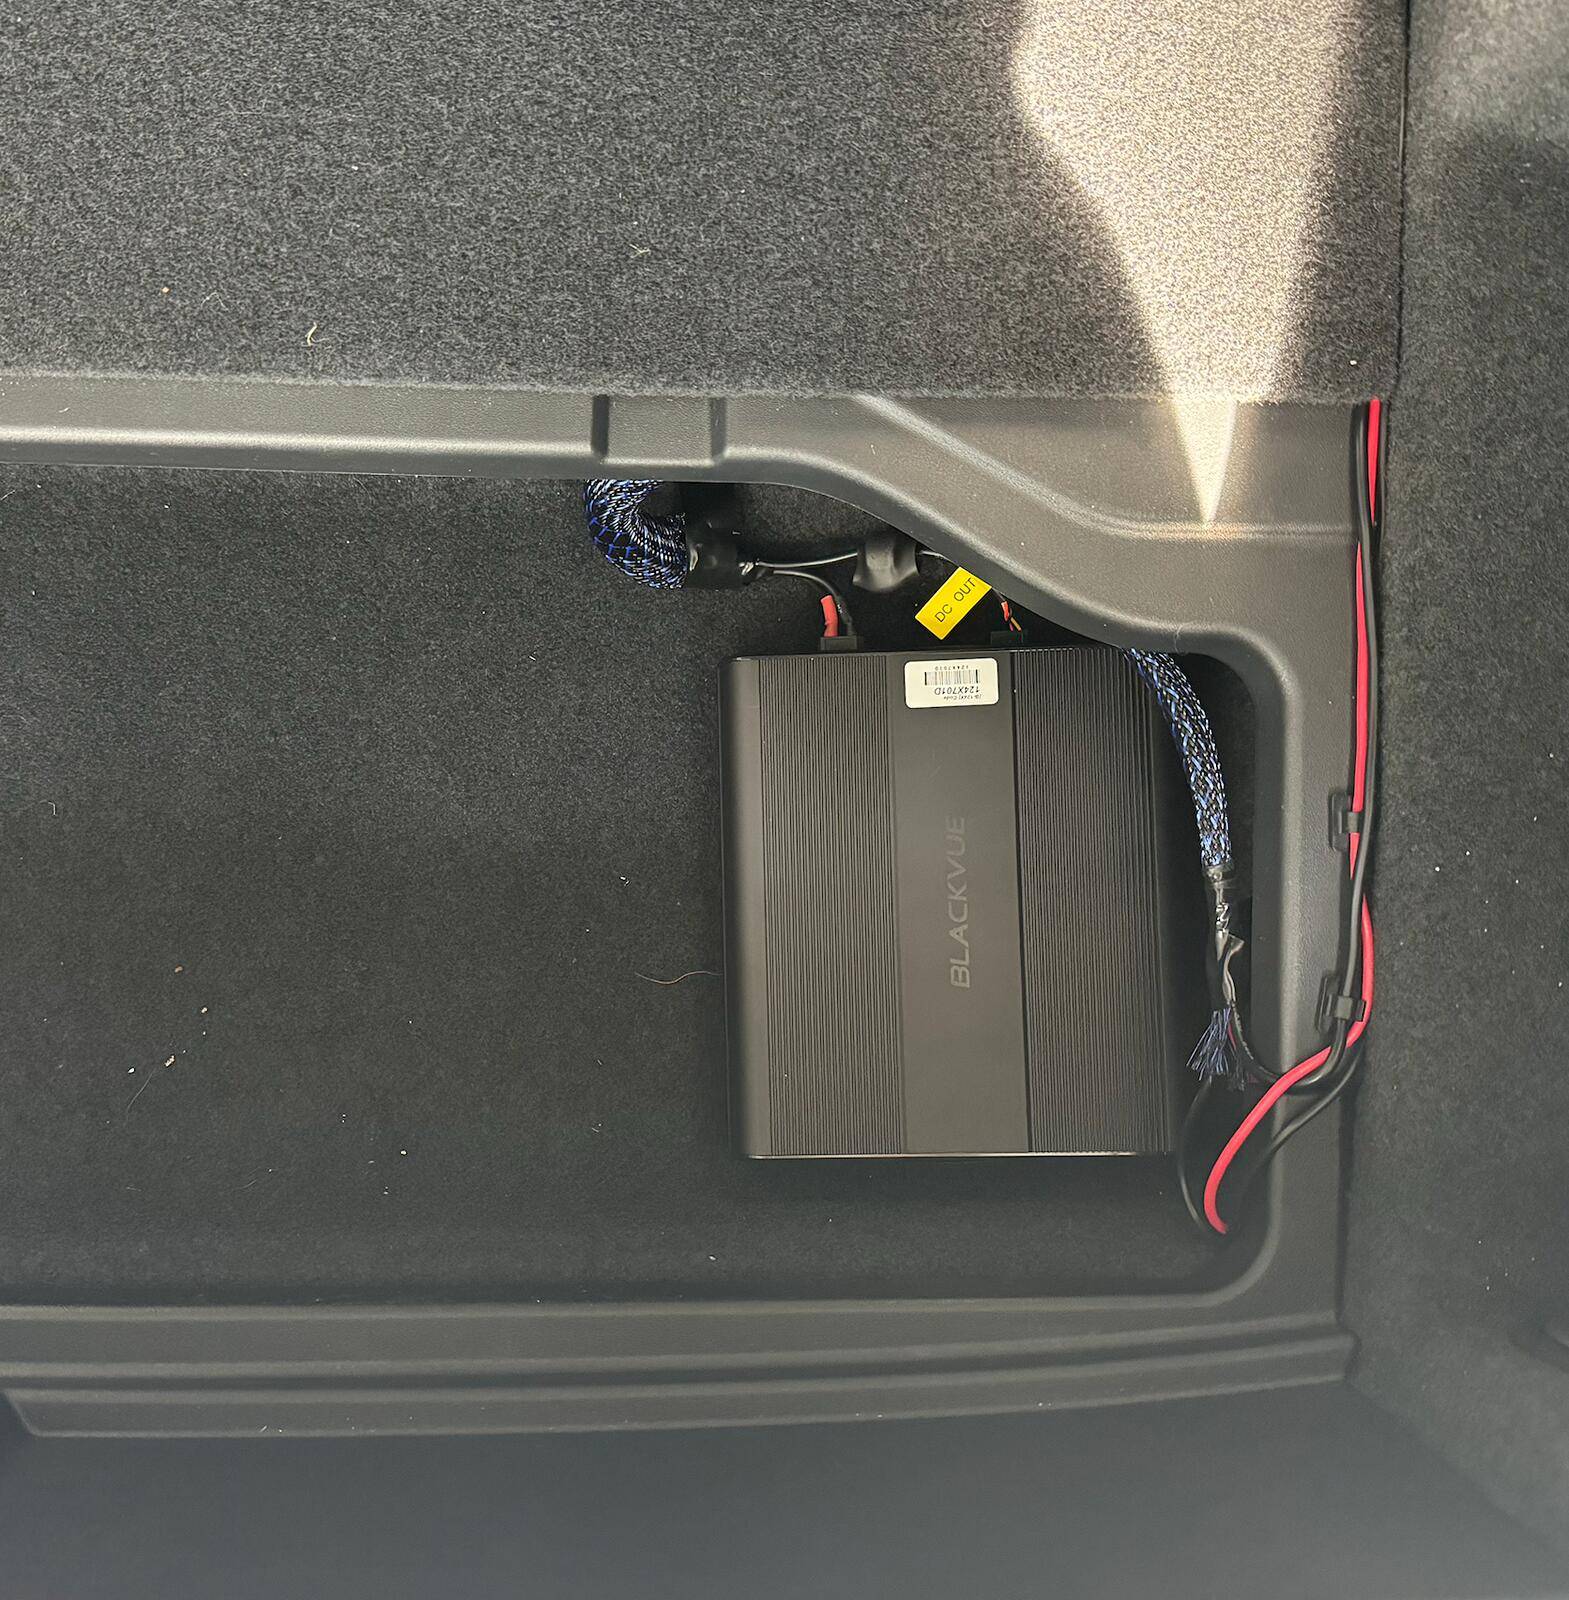
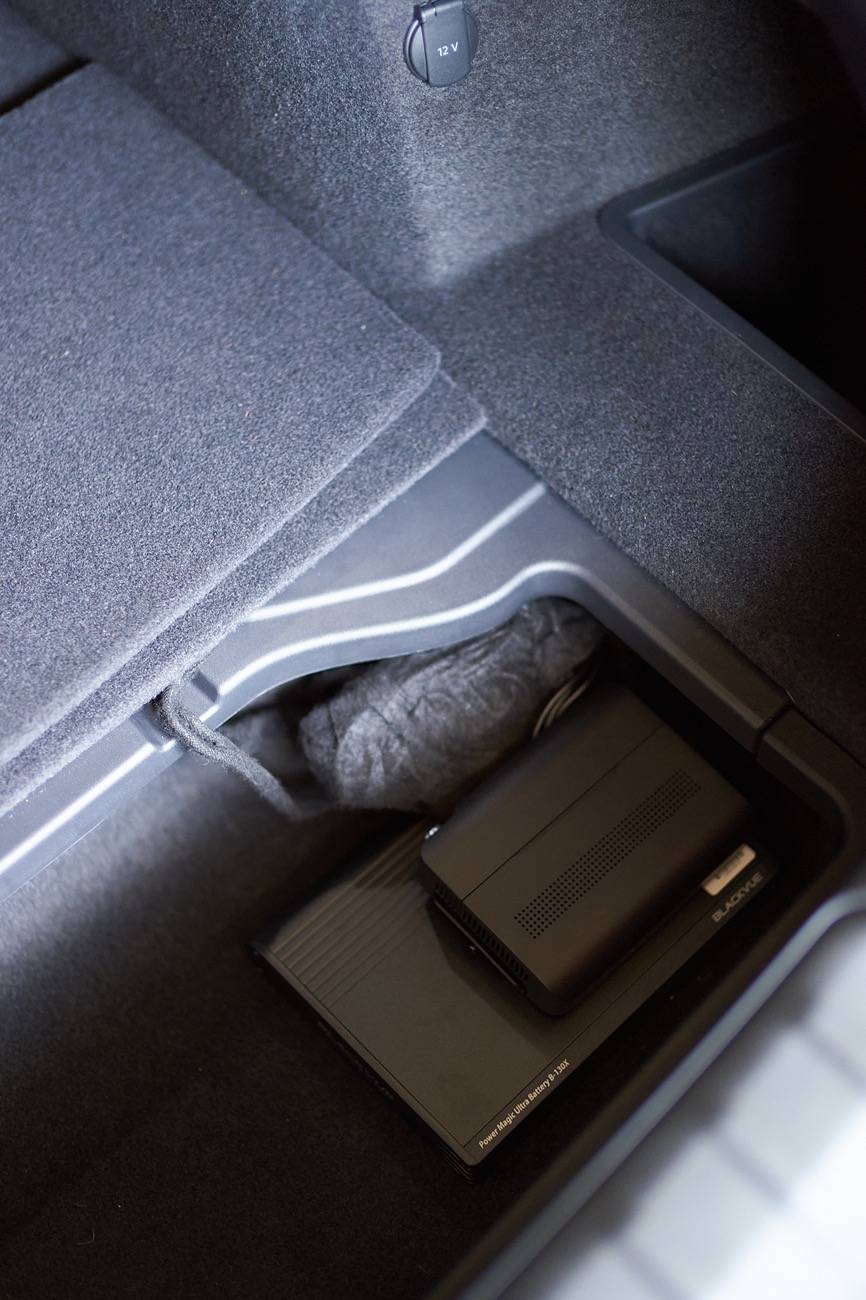
- Hardwire in the passenger footwell fusebox, but use an extended battery power cable (and extended camera power cable) to still place the battery in the trunk. This is what I did -- this way the battery only charges when the car is "on" and it is neatly hidden in the trunk
Soldering is a bit of a hassle but not too difficult, here is a nice tutorial. And if you don't like to solder, you could always use crimping or nice heat-shrink connectors.For the hardwired battery power connection, I bought two 17 feet, 14 AWG wires (red+black) from Home Depot and soldered it to the connector that was provided (do not use thinner wires as the charging is done at 9A). For the camera power cable, I soldered the Blackvue provided cable (with the B-124X) to the hardwire power cable that comes with the 900x camera to have enough length.
To remove the passenger side panel, work from the bottom to the top and it pops right out. This gives access to a ground screw:
Then, attach the battery power ground wire, which you can do by using an M8 hex nut. That way there is no need to loosen the existing nut. (don't close the side panel until later to hide cables better)
After this, remove the fuse box panel in the passenger footwell :
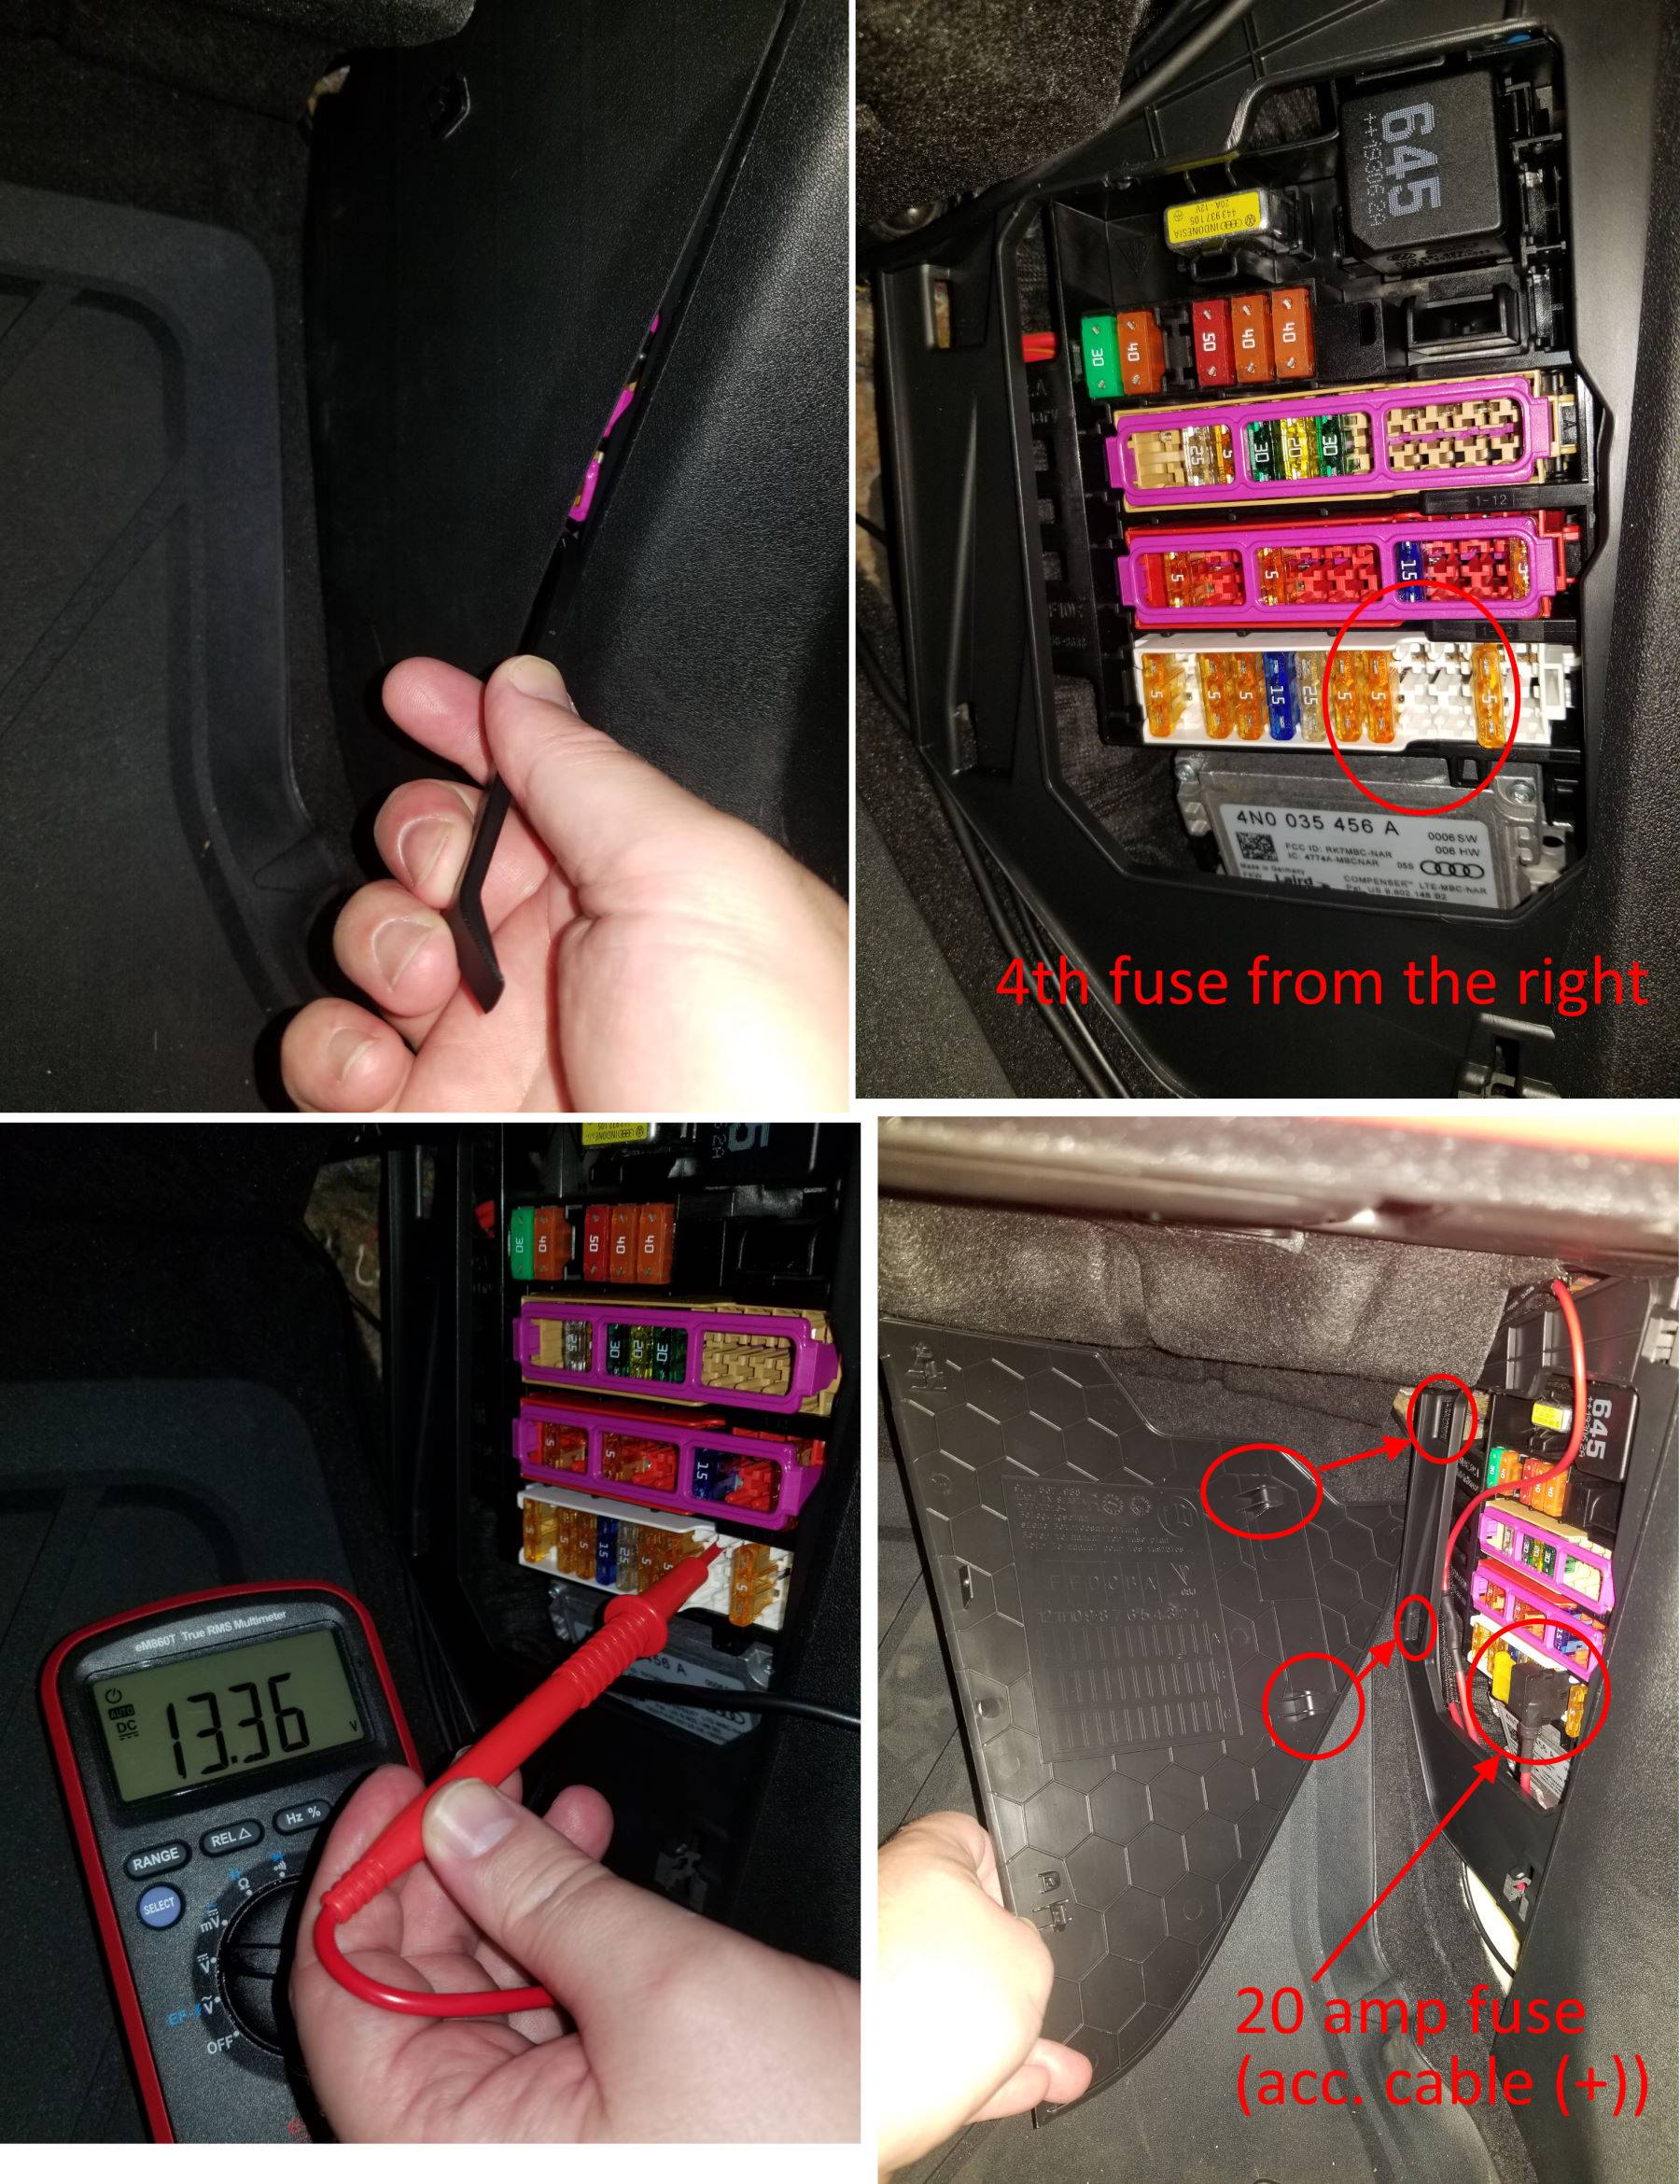
The fourth fuse slot from the right at the bottom row is unused, but gets powered only when the car is on, just what we need. (The manual says this fuse location is only used for "right-hand-drive" vehicles to power the BCM control unit). Use the fuse-tap that comes with the B-124X and the provided yellow ATC 20A fuse (actually, if you have a blue 15A fuse that would be a bit better as charging is at most done at 9A).
Place the new fuse at the top of the fuse-tap and leave the bottom one empty (as it is an unused fuse slot), and attach the red acc. cable for the battery to the fuse tap using the provided crimp connection using a crimping tool. Insert the fusetap "downwards" as shown in the picture since only the top row of the fuse panel is powered. (don't close the panel until later so you can route cables nicely).
Now test if the hardwired setup is working by directly attaching the B-124X and the camera:
You can connect with bluetooth to the battery (using the app) to see it charge when the car is turned on, and drain when the car is turned off. (in my case, the new battery was completely empty so needed to charge for a few minutes before bluetooth started working).
If it all worked, we can then route the camera power cable, the rear camera cable, and the hardwired battery power cables all the way to the back. I think the best way is on the bottom of the car next to the seats under the plastic panel there -- can be done just by pushing under it. (I did not remove any panels).

Quite a bit of work, but happy how it turned out
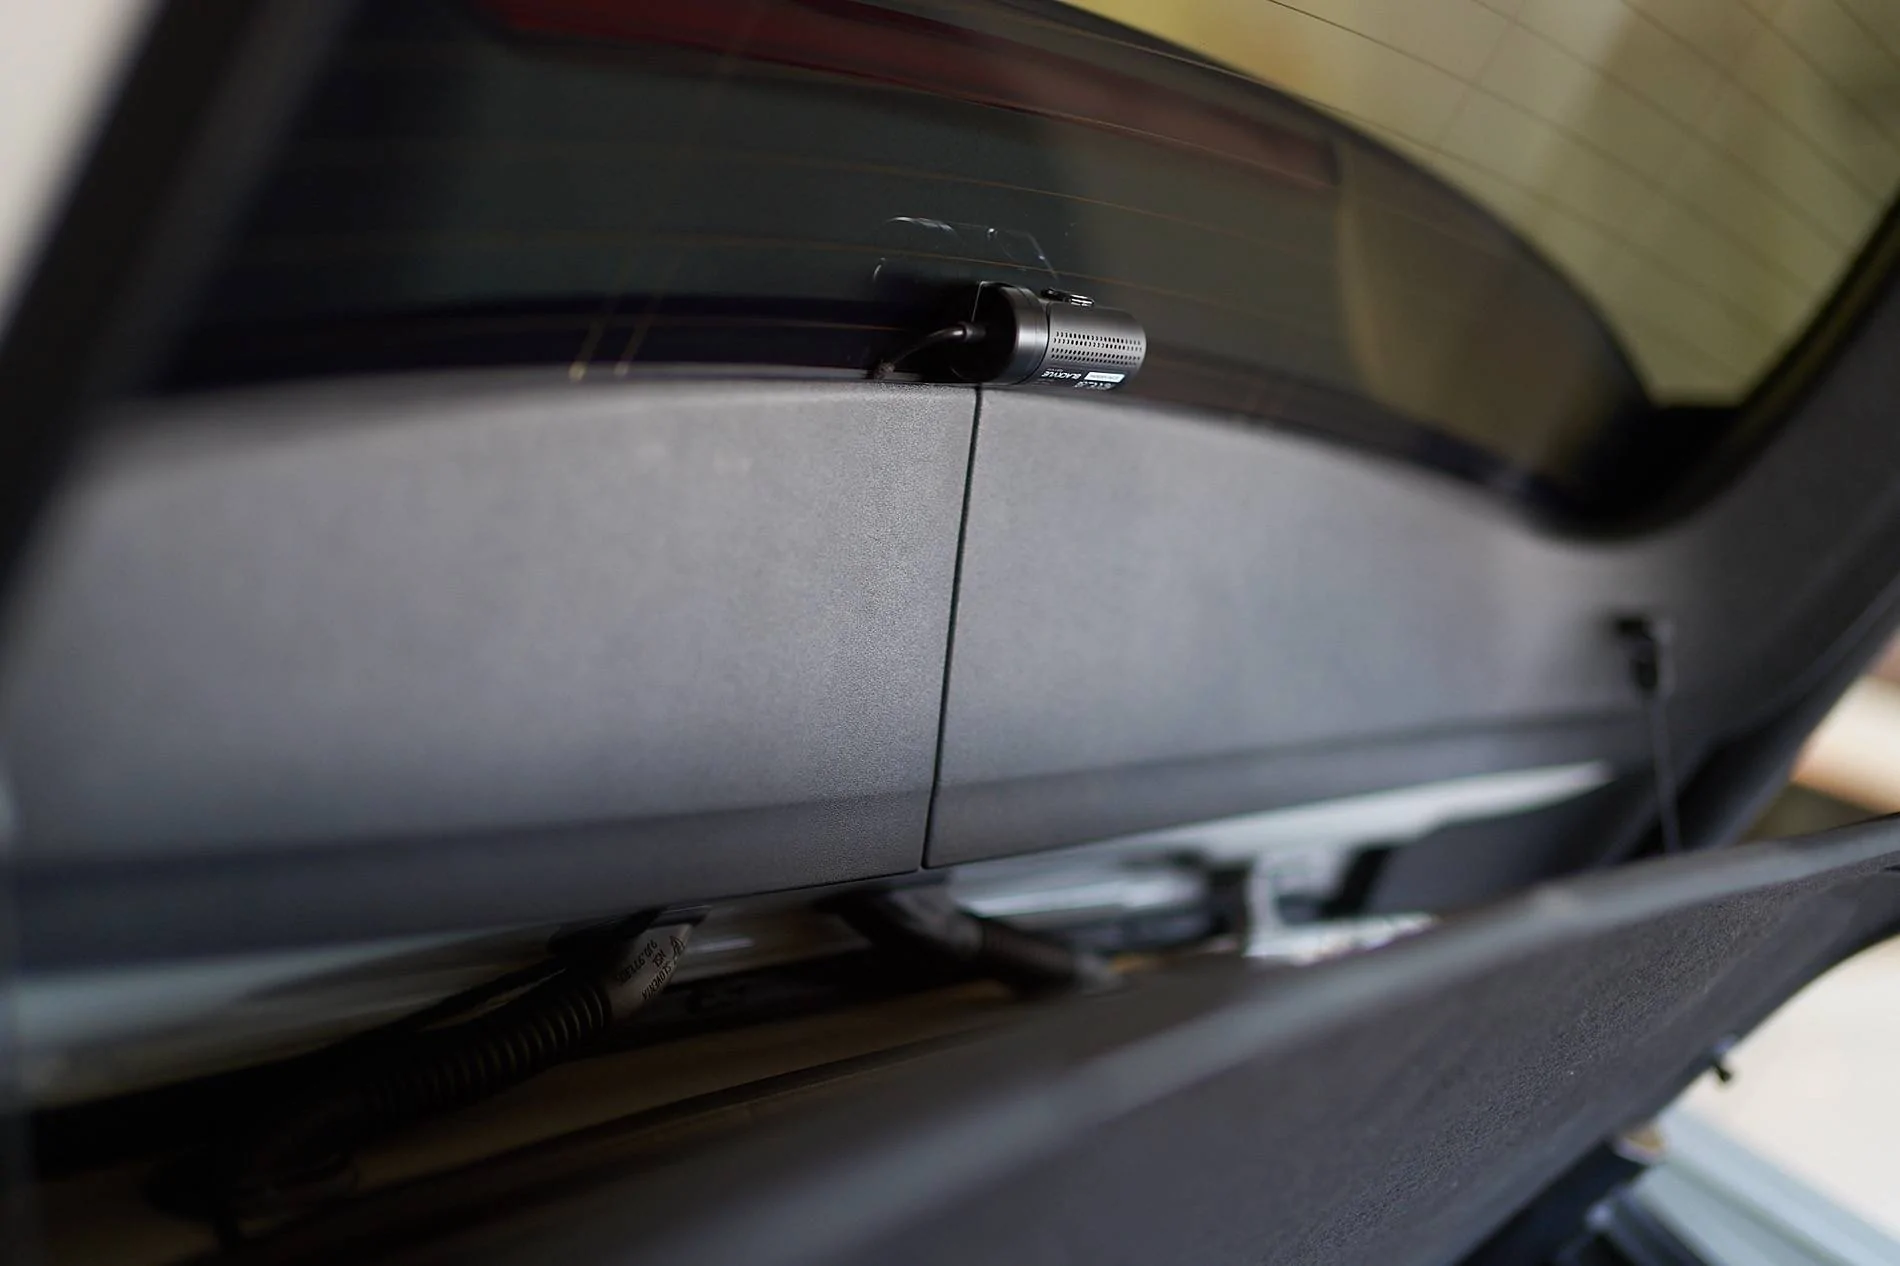
edit: 2022-10-30: it turned out that the camera could not receive a GPS signal at the installed spot as shown above (1). I think this is due to the thermally and noise insulated glass perhaps. I needed to remove it (use the plastic tool again to force it off and use thinner/turpetine to remove the glue residue), and reinstall the camera inside the dotted area:
unfortunately that makes it more visible and less centered but overall it still looks fine; I tried other areas but this one is the only one that had reliable gps reception. (here is another thread that uses a similar location -- that one is a tad more to the left but then you will get the black dots into the view).
Sponsored
Last edited: